Create a Lesson Card
In this article, you will learn how to:
Create a lesson card
There are four parts to a card: Content, Interaction, Response, Loopback (optional), and Hint.
To create a lesson:
In the Creator Dashboard, select Create Exploration. The Exploration Editor opens.
Select the pen icon next to the Introduction. The editable text block opens up.
When the lesson content is completed, select Save Content.
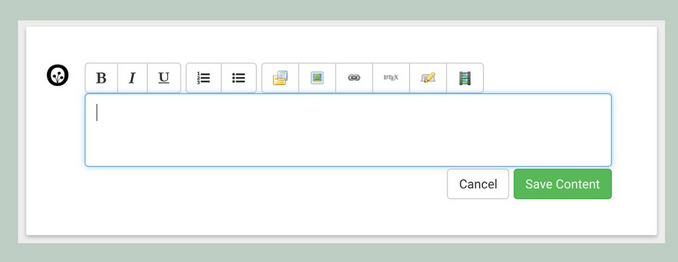
Fig. 1. Editable text content
In the text block, you can design the lesson’s content. The content should end with a question or statement that invites the learner to interact with Oppia. You can format content and include rich-text elements such as images, videos, and links.
Note: Avoid using the following, which will not work on the Android app:
Videos
Collapsible block
Tabs
External links
When writing the content for the lesson, make sure to set the scene, which includes:
Who are the characters in this story?
How do they connect with the lesson?
What situation arises that helps learners understand a new topic?
Add an Interaction
Interactions are an important element of building a lesson. They are where Oppia interacts with the learner through a question or by prompting an action.
Note
If you have an idea for an interaction that isn’t currently available, file an issue on GitHub describing this new interaction and what you’d like it to do. We’ll keep track of your request and may implement it.
Choose an Interaction
The question you choose to ask will affect which interaction is best to use. Oppia offers several built-in interactions, sorted by subject matter, to choose from.
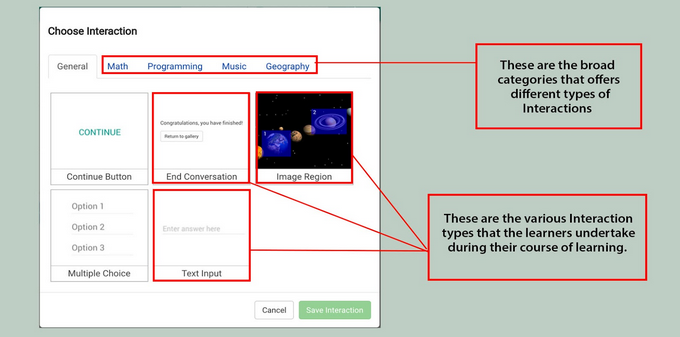
Fig. 2. Available interaction types
Select the card you would like to add an interaction to
Under the Interaction panel, select +Add interaction.
Select the interaction that best fits the card. The Customize Interaction panel opens.
In the Customize Interaction panel, edit properties to match the question you are asking. For example, in a multiple-choice interaction, you can edit each option and choose the number of options.
Select Save Interaction. The Responses panel opens.
In the Add Response panel, provide details on how Oppia should respond based on the learner’s answer. In the Add Response panel, you can: * Move the learner to a new card * Ask them to try again * Offer feedback based on their response
Add Responses to a Question
You should add both correct and incorrect responses to a question. Adding these responses will help the learner understand their progress,
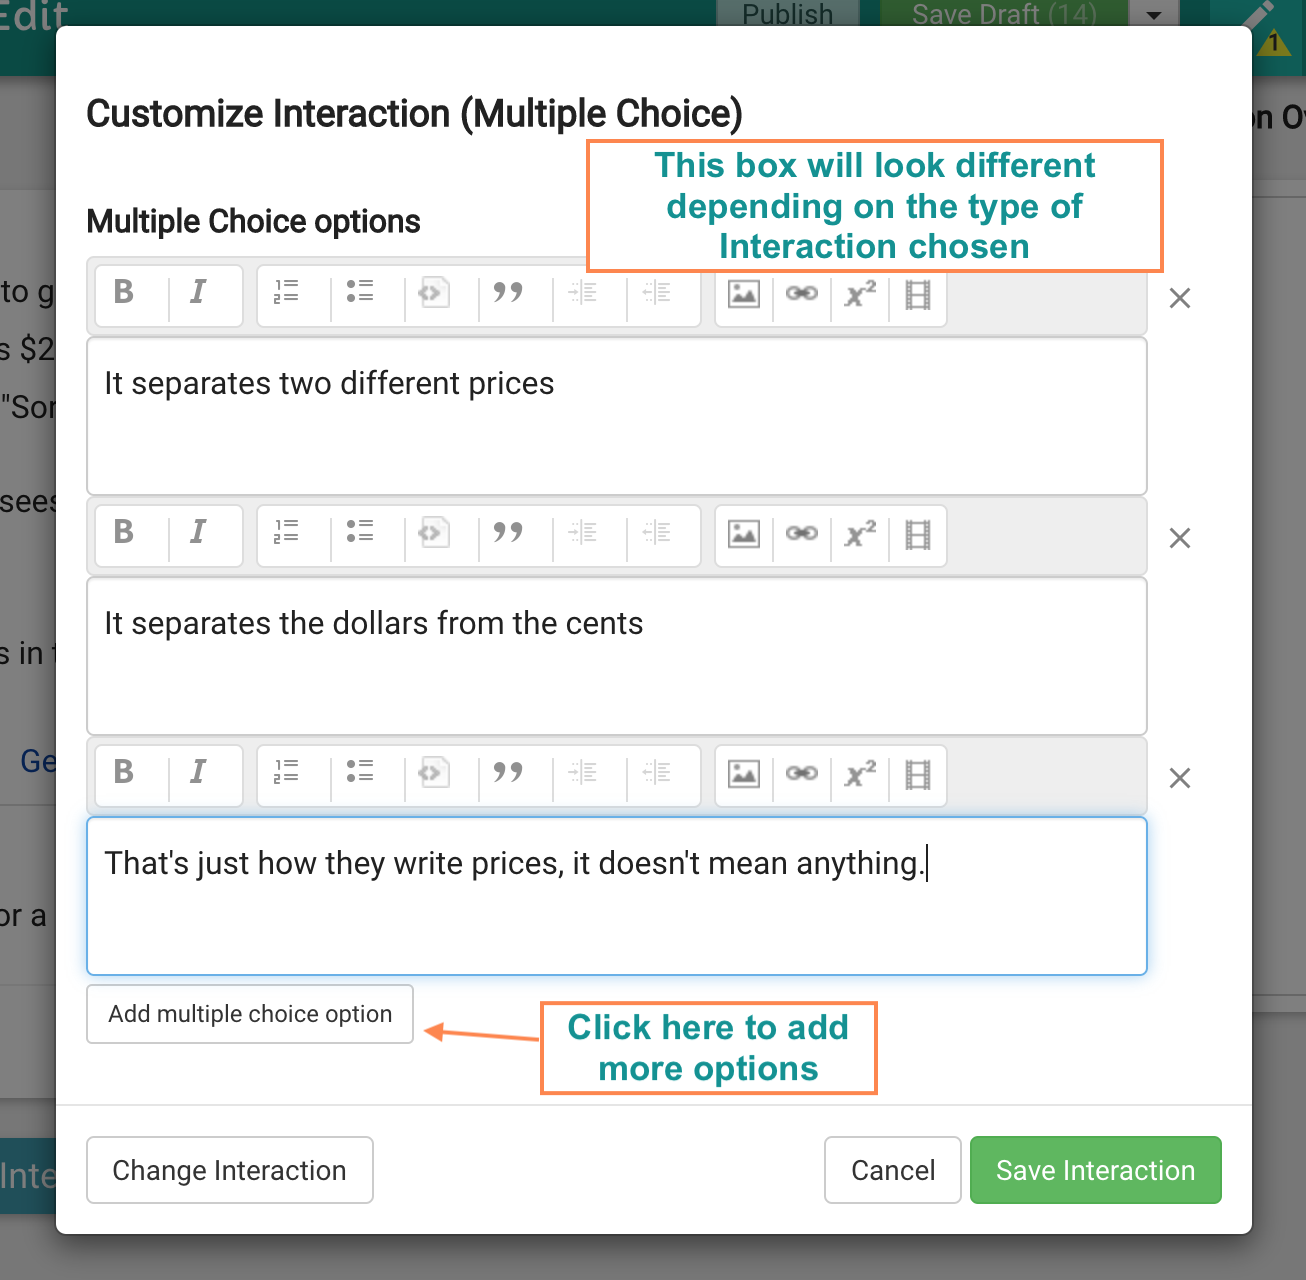
Fig. 3. Customized interaction
To set up a correct answer for the question “What is 2 + 3?”:
In the If the learner’s answer… dropdown menu, select is equal to.
Under the parameter menu, choose the correct option. In this case, it’s 5.
In Oppia, tell the learner… in the heading, write clear, useful feedback, even for correct answers.
Under And afterwards, directs the learner to…, choose A new card called… and enter the name of the next card.
Select the checkbox for Answers in this group are correct.
Select Save and Add Another.
For incorrect answers and responses:
The Rule dropdown remains is equal to.
Under Parameter, choose an incorrect answer. We’ll start with the response, 4.
Under the Oppia tells the learner… heading, provide specific feedback on why 4 is not the correct answer.
Under the And afterwards, directs the learner to… heading, select (try again) to keep the learner on the same card until they select the correct answer.
Select Save and Add Another.
Repeat for all remaining incorrect answers.
You can add, remove, and edit any response in the Learner’s Answers and Oppia’s Responses panel.
Ask learners to explain their answer
Once you’ve added at least one response:
Check the Solicit Answer Details checkbox at the bottom of the Learner’s Answers and Oppia’s Responses panel to ask the learner to explain why they chose the answer on that card.
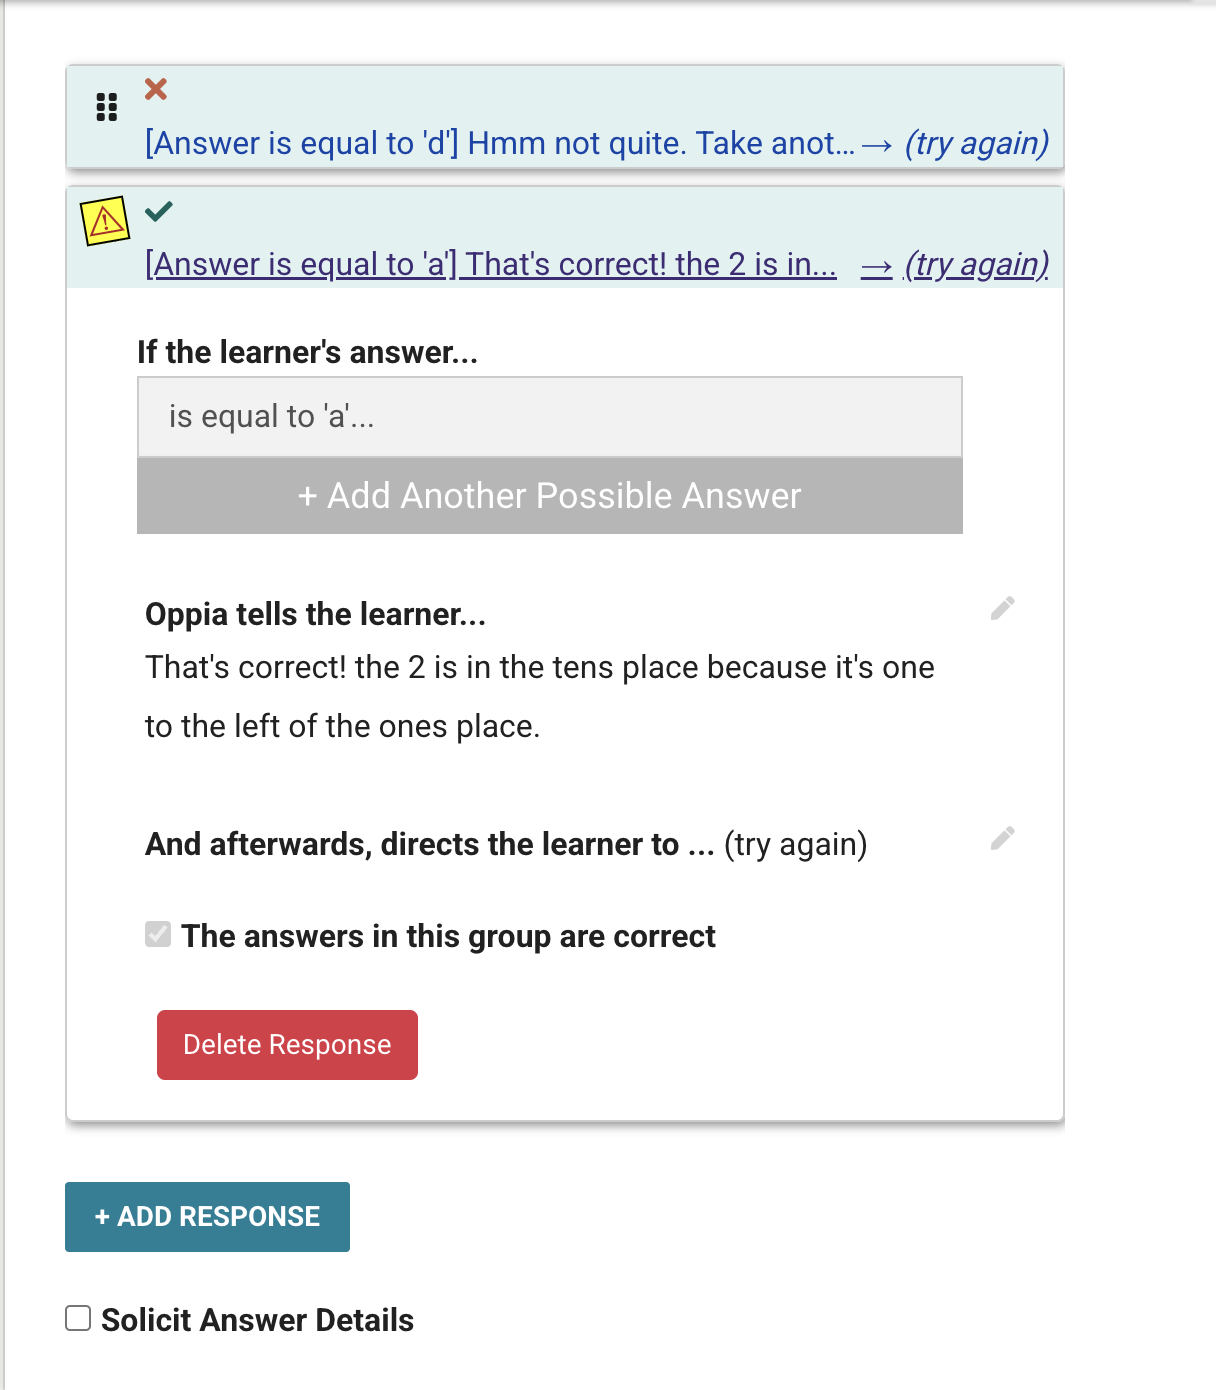
Fig. 5. Solicit Answer Details feature
Add Hints
Hints support learners who are struggling with a question without giving away the full answer. You can add one or more hints to any card in your exploration.
You can access the Hints panel at the bottom of the Editor screen. It’s grouped with the Learners Answers, Oppia’s Responses and the Interaction panel.
When a hint appears
To make sure learners use hints meaningfully, they can only request them if one of the following conditions is satisfied:
The learner submitted an incorrect answer at least once.
30 seconds have passed since the learner last submitted an answer.
To add a hint
Select +Add Hint at the bottom of the Editor screen.
In the Add Hint panel, type out the hint.
Select Save Hint.
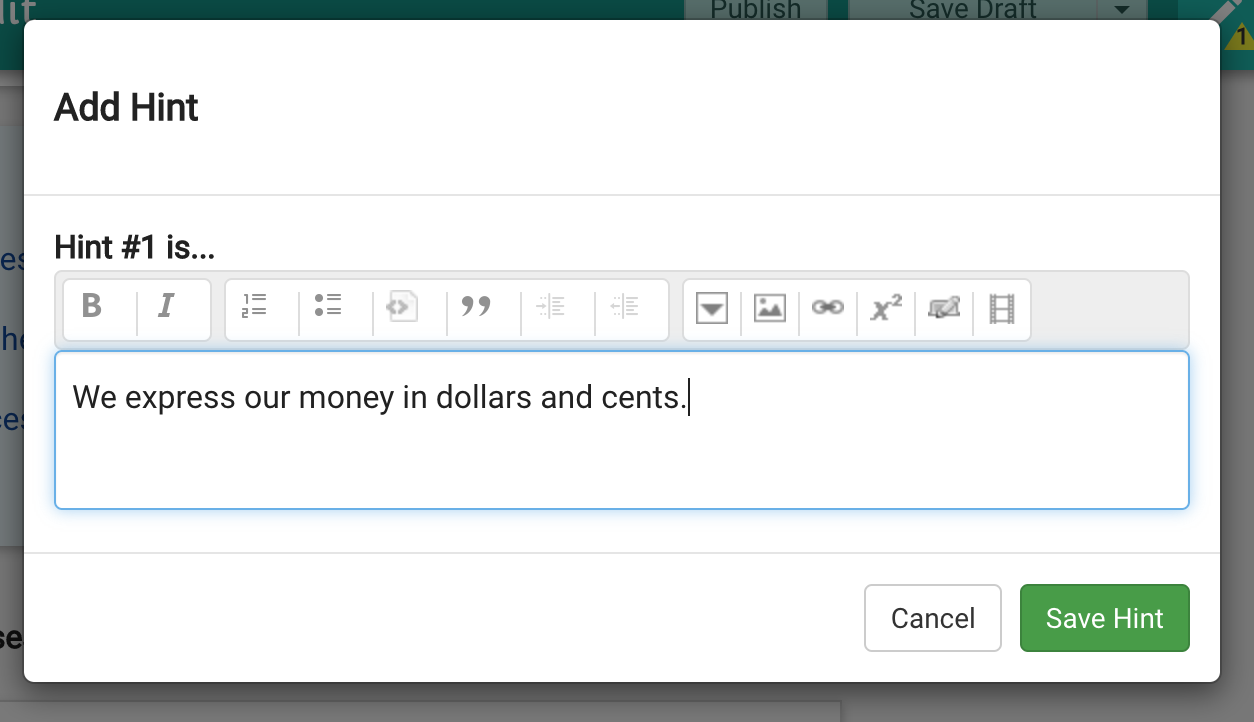
Fig. 6. Add Hint interface