Editing and Publishing a lesson
In this section, you will learn how to:
Watch this video to learn how to edit and publish an exploration, or if you prefer reading the instructions instead, keep scrolling down.
Editing content
In your exploration, you can navigate to different cards at any time by clicking on the card in the Exploration Overview section.
From here, you can make changes to any section within the card. To delete an entire card from the exploration, click on the small x in the top-right corner of the card.
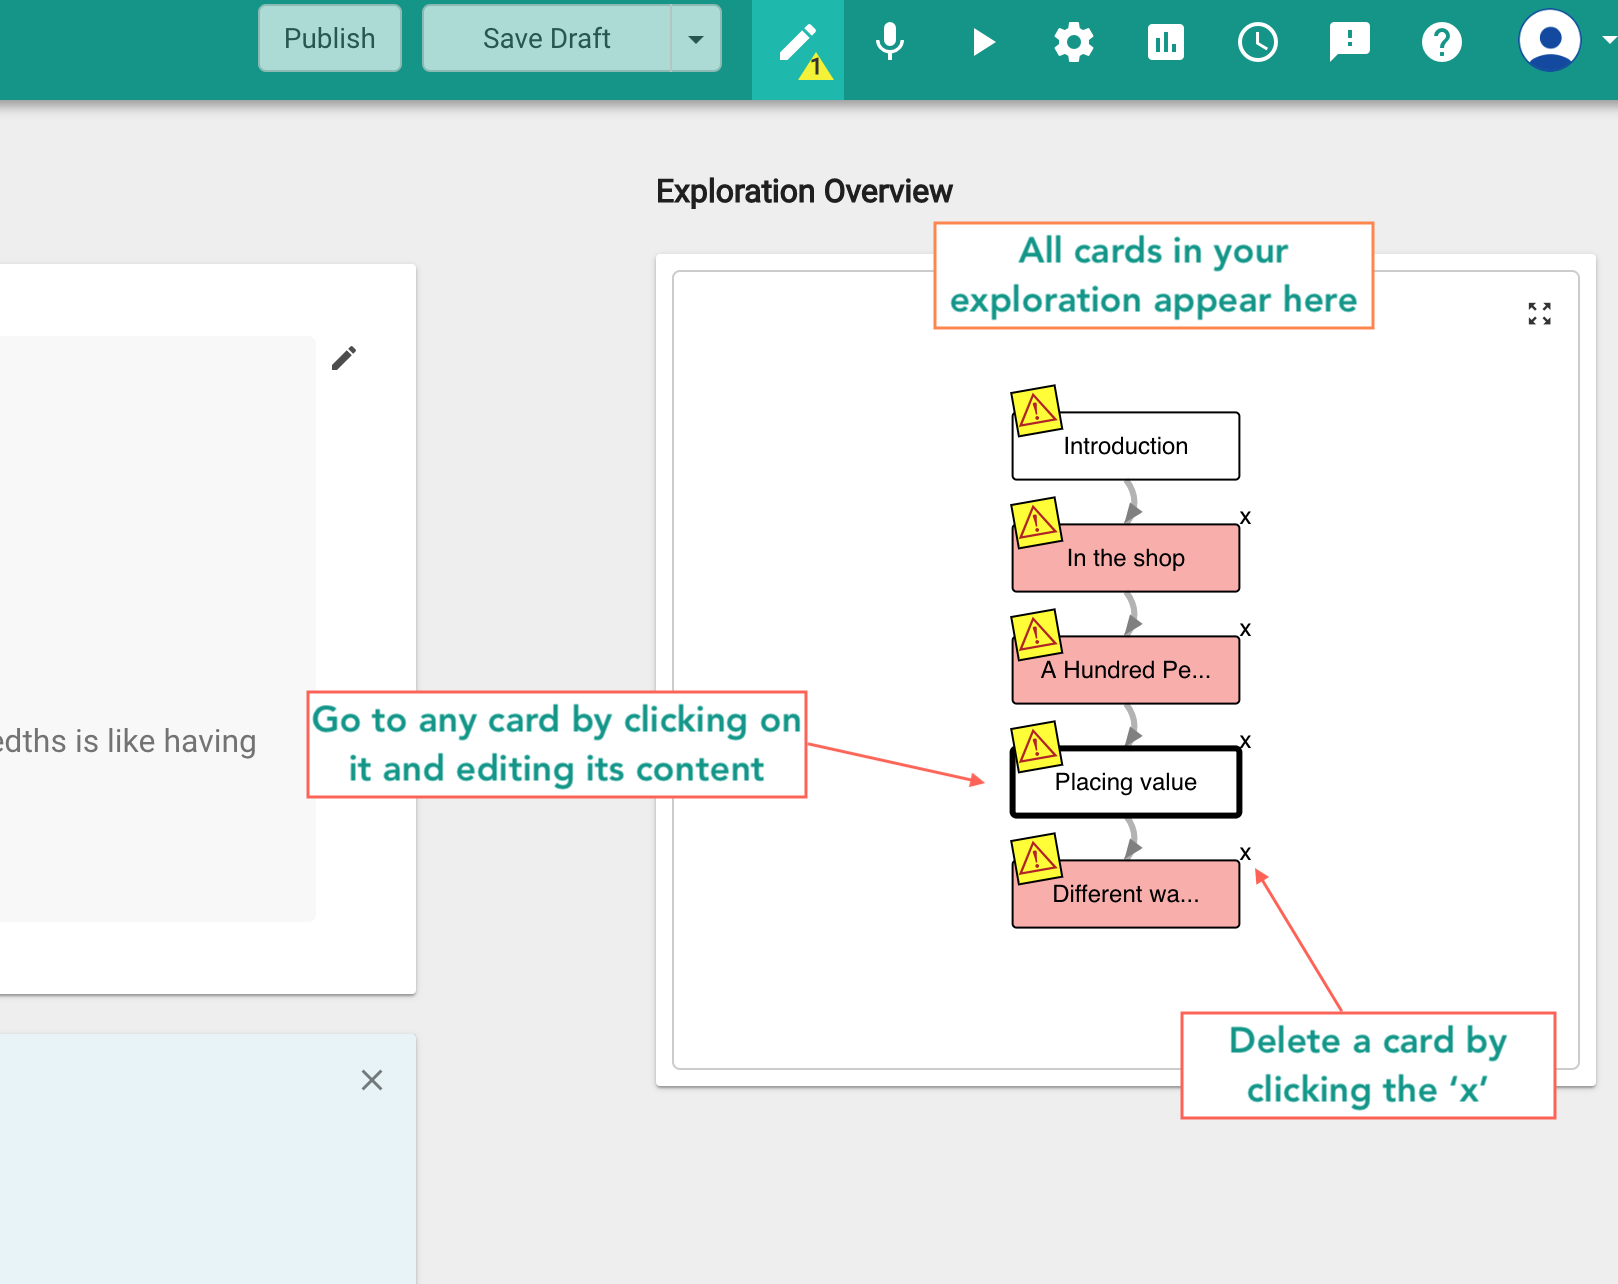
Fig. 1
To delete the entire exploration, go to the
 Settings button in the navigation bar, and click the
  button located at the bottom of the page.
Working with older versions of the exploration
Every time you save your exploration, Oppia keeps a record of that version. To save a draft of your exploration, click the
 button in the top navigation bar. In the pop-up box that appears, you can type in an optional message describing the changes made.
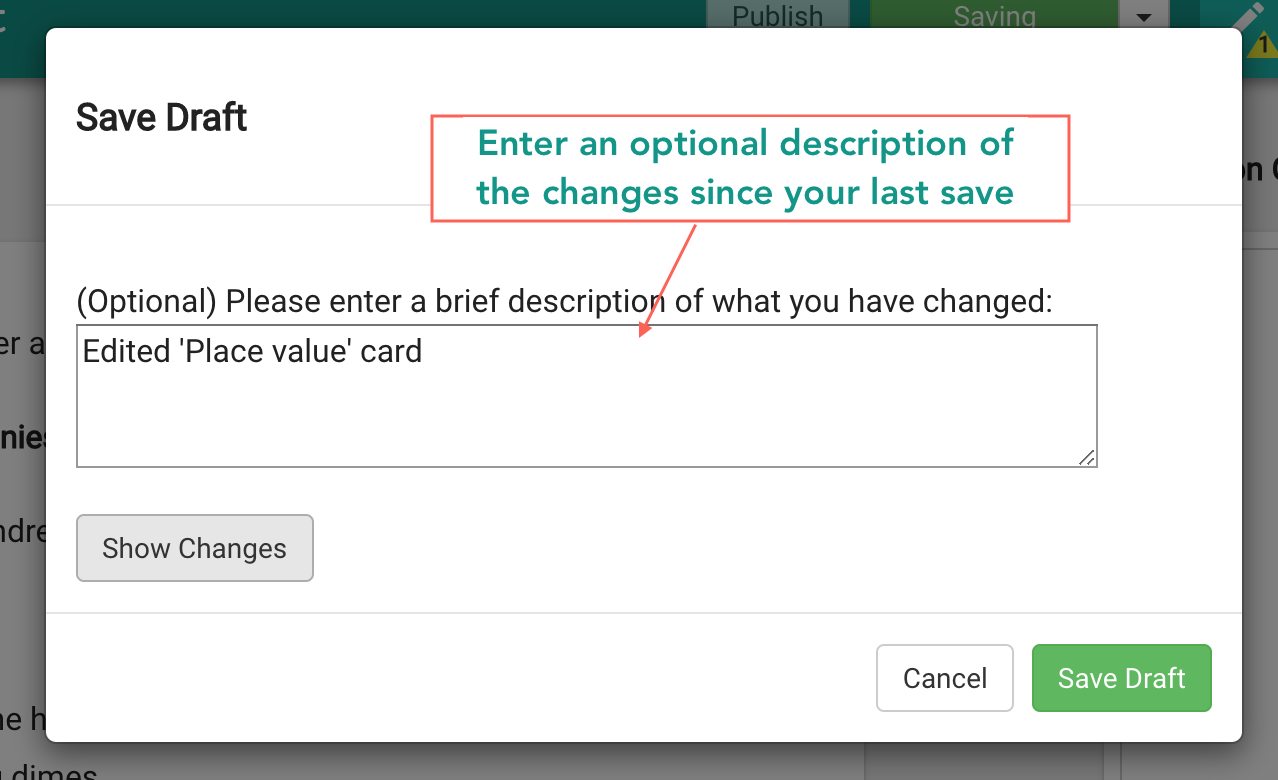
Fig. 2
You can view a list of all saved versions at any time by clicking the
 History button.
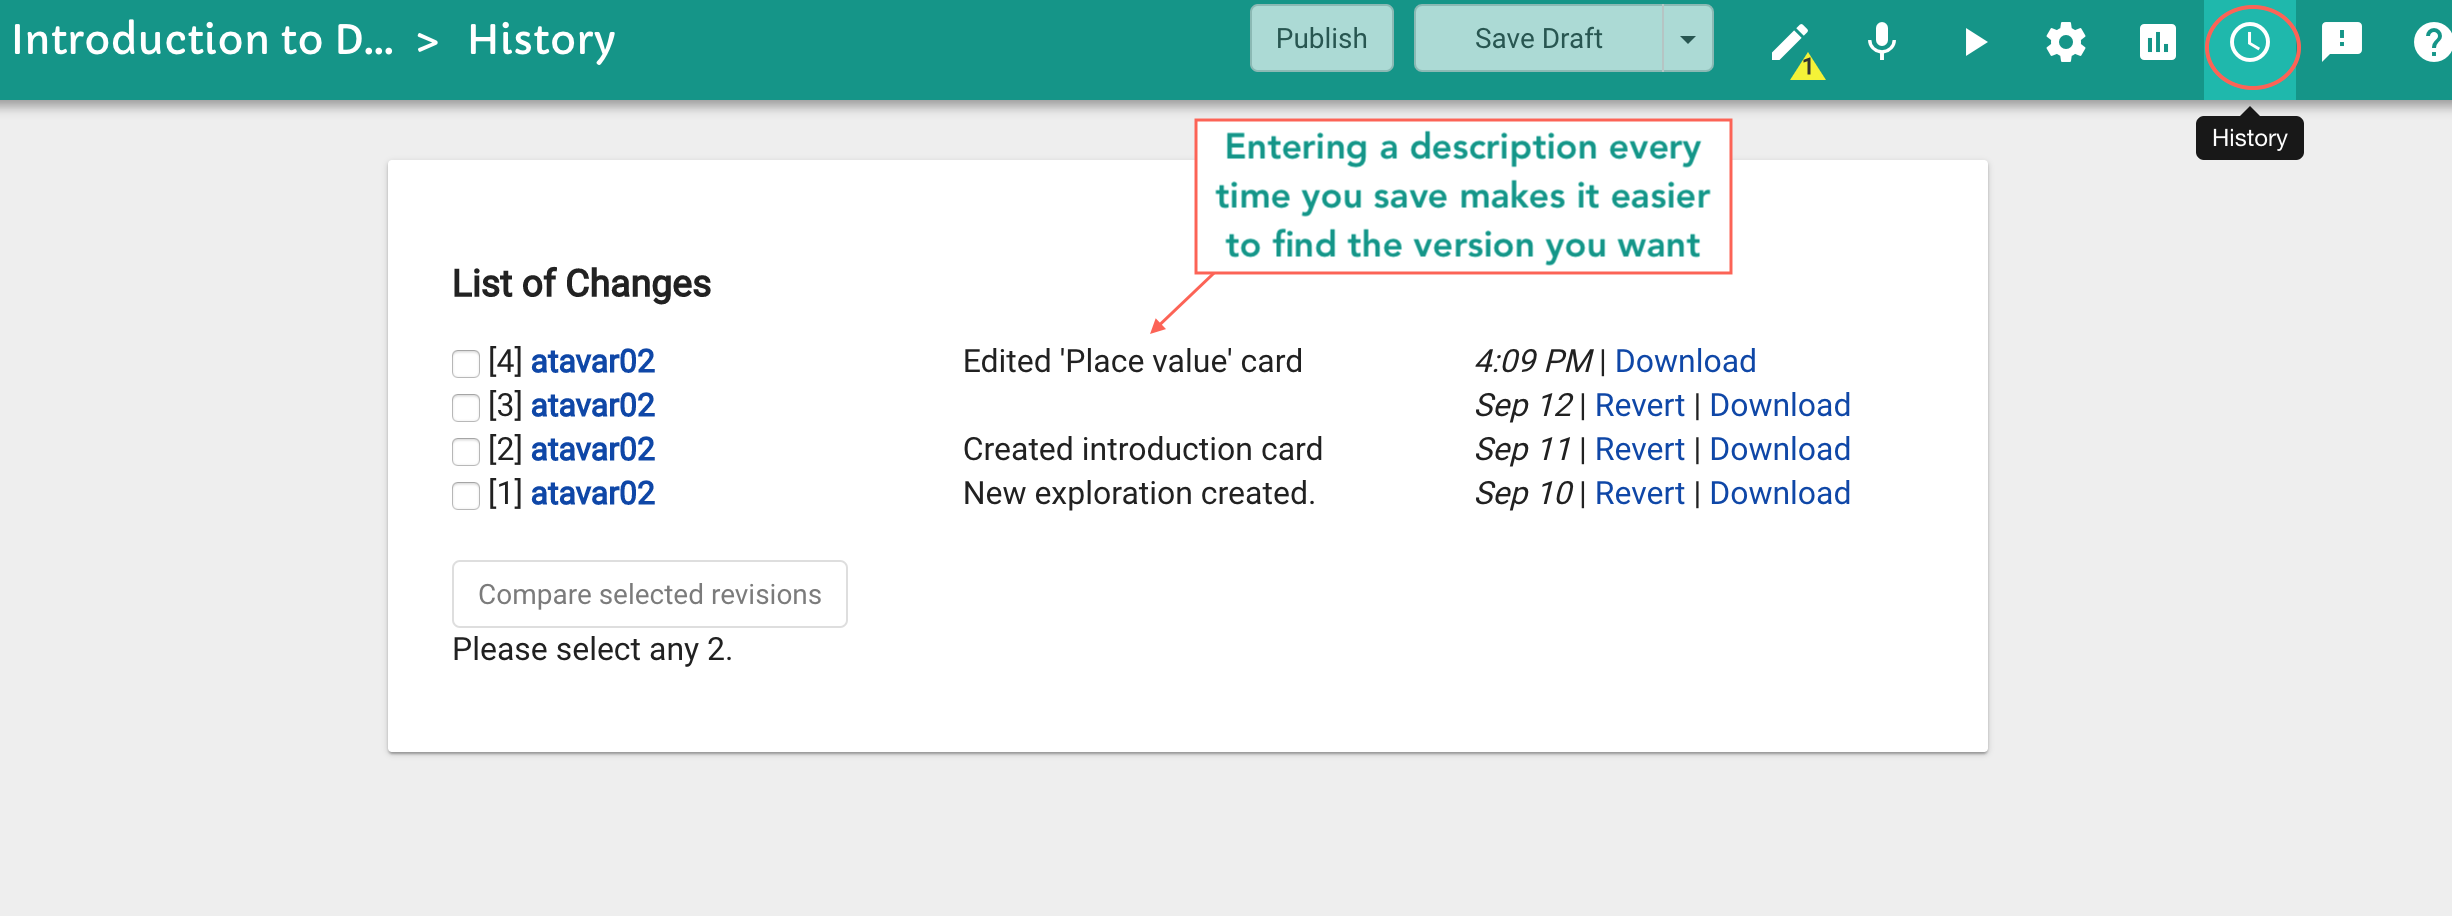
Fig. 3
From the History screen, you have the following options:
Compare selected revisions
Select any two previous versions and click the  button to view what was changed.

Fig. 4
Revert to a previously saved version
Click the Revert link next to any version of your exploration to revert and go back to using that version. This change will now be recorded and added to your History under the list of changes.
Warning
When you revert to an older version, you will lose any unsaved changes in your exploration. If you think you might want to come back to your current version at some point later on, make sure you save your draft before reverting so that Oppia has a record of it.
Download a version
Click the Download link next to a version to download a zip file that will contain all the data for your exploration. It will include a YAML file as well as any additional asset files (such as images) that are part of your exploration. You can now share this file with other people if you wish.
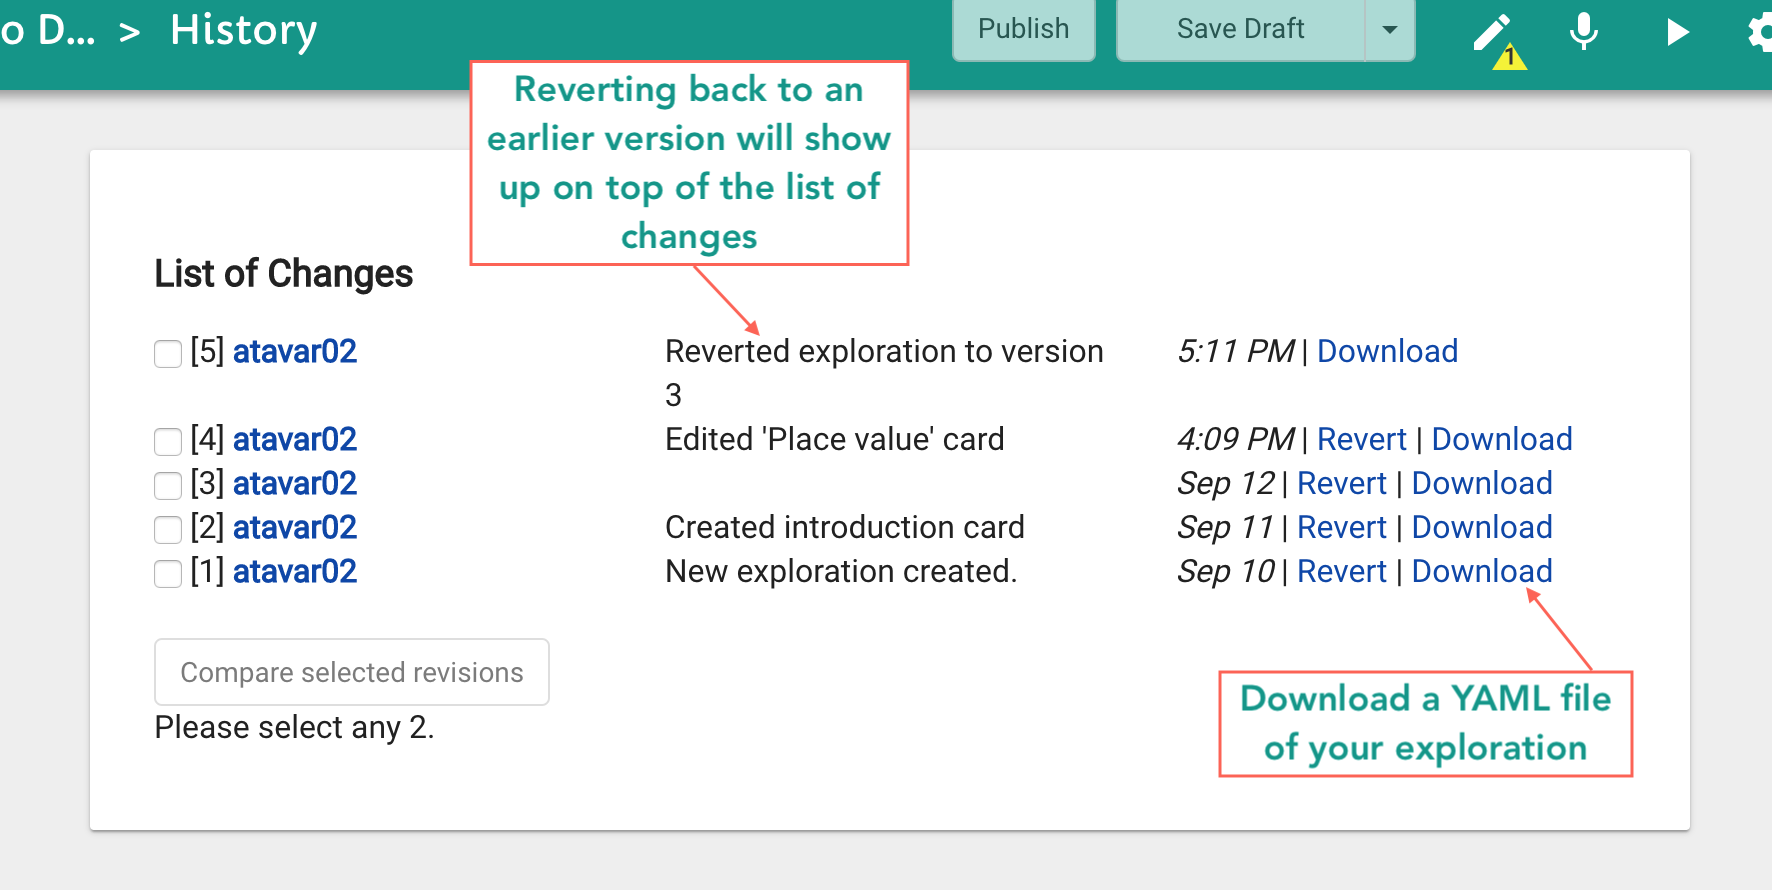
Fig. 5
Reviewing errors and ending the exploration
In the Exploration Overview section, you might see yellow warning signs next to the card(s). You need to resolve these warnings before you can publish your exploration. Hover your mouse over these signs to read the warning messages, then click on the card to resolve the issue.
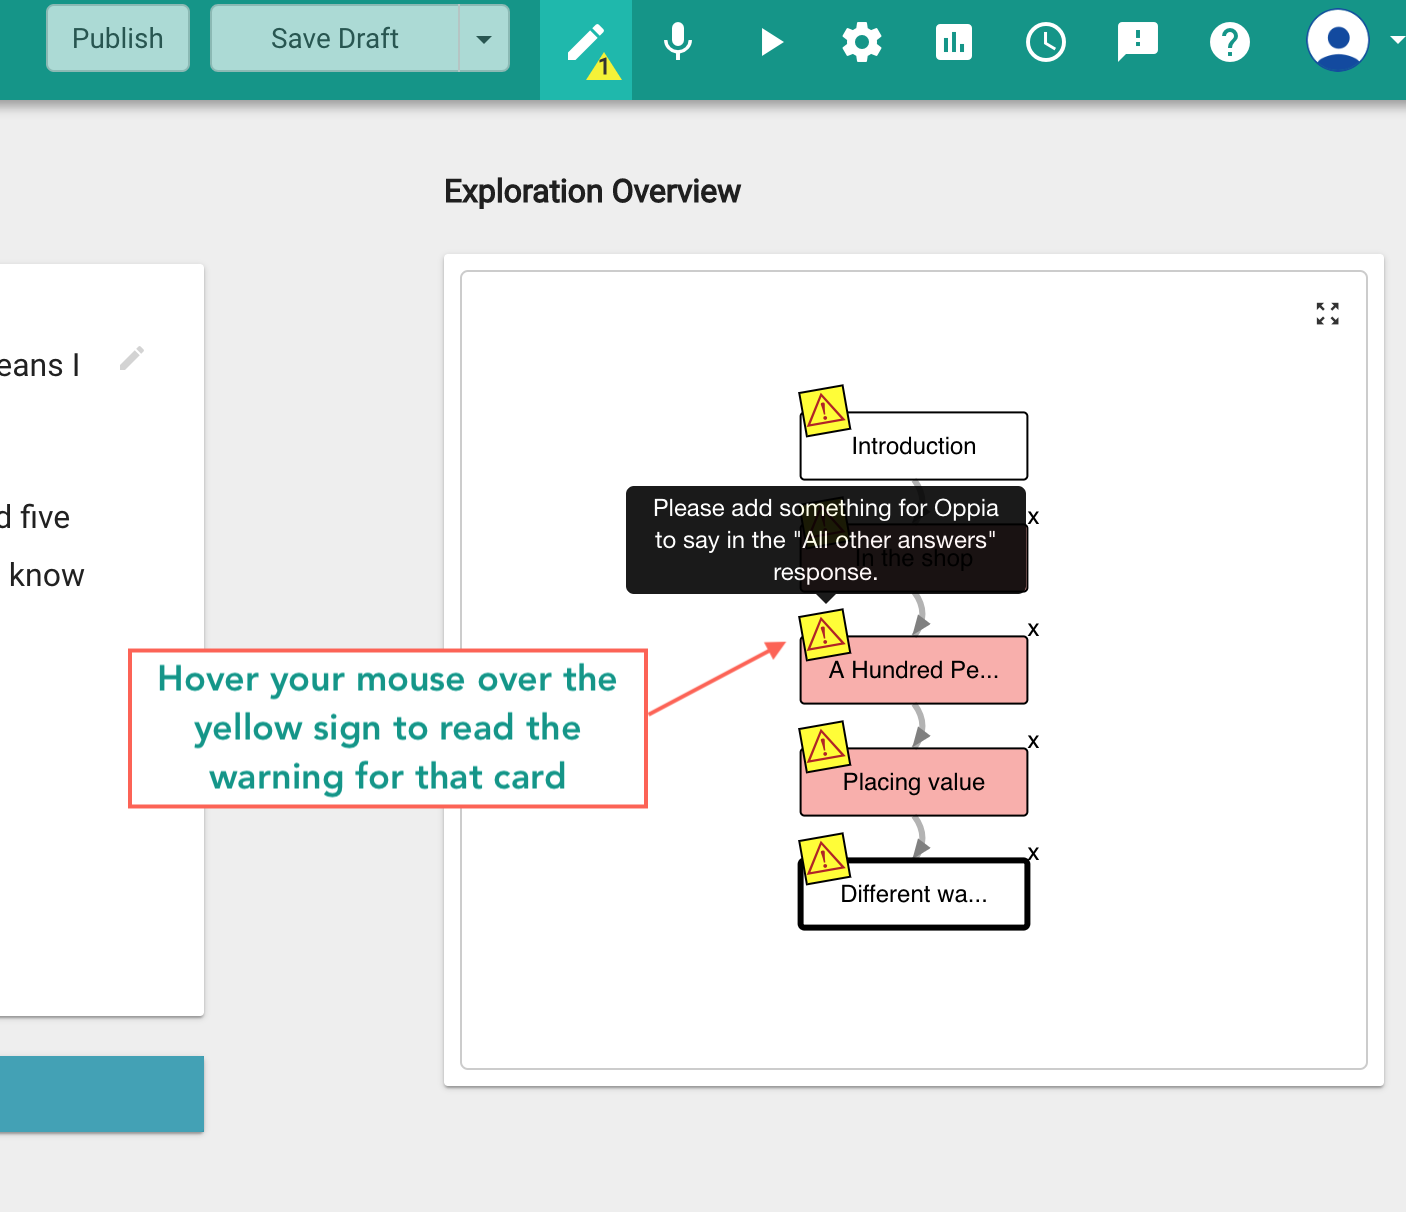
Fig. 6
Another common warning message tells you that you haven’t properly ended your exploration. To do this, go to the last card of your exploration and click on the
 button. In the pop-up box, click the End Exploration interaction button.
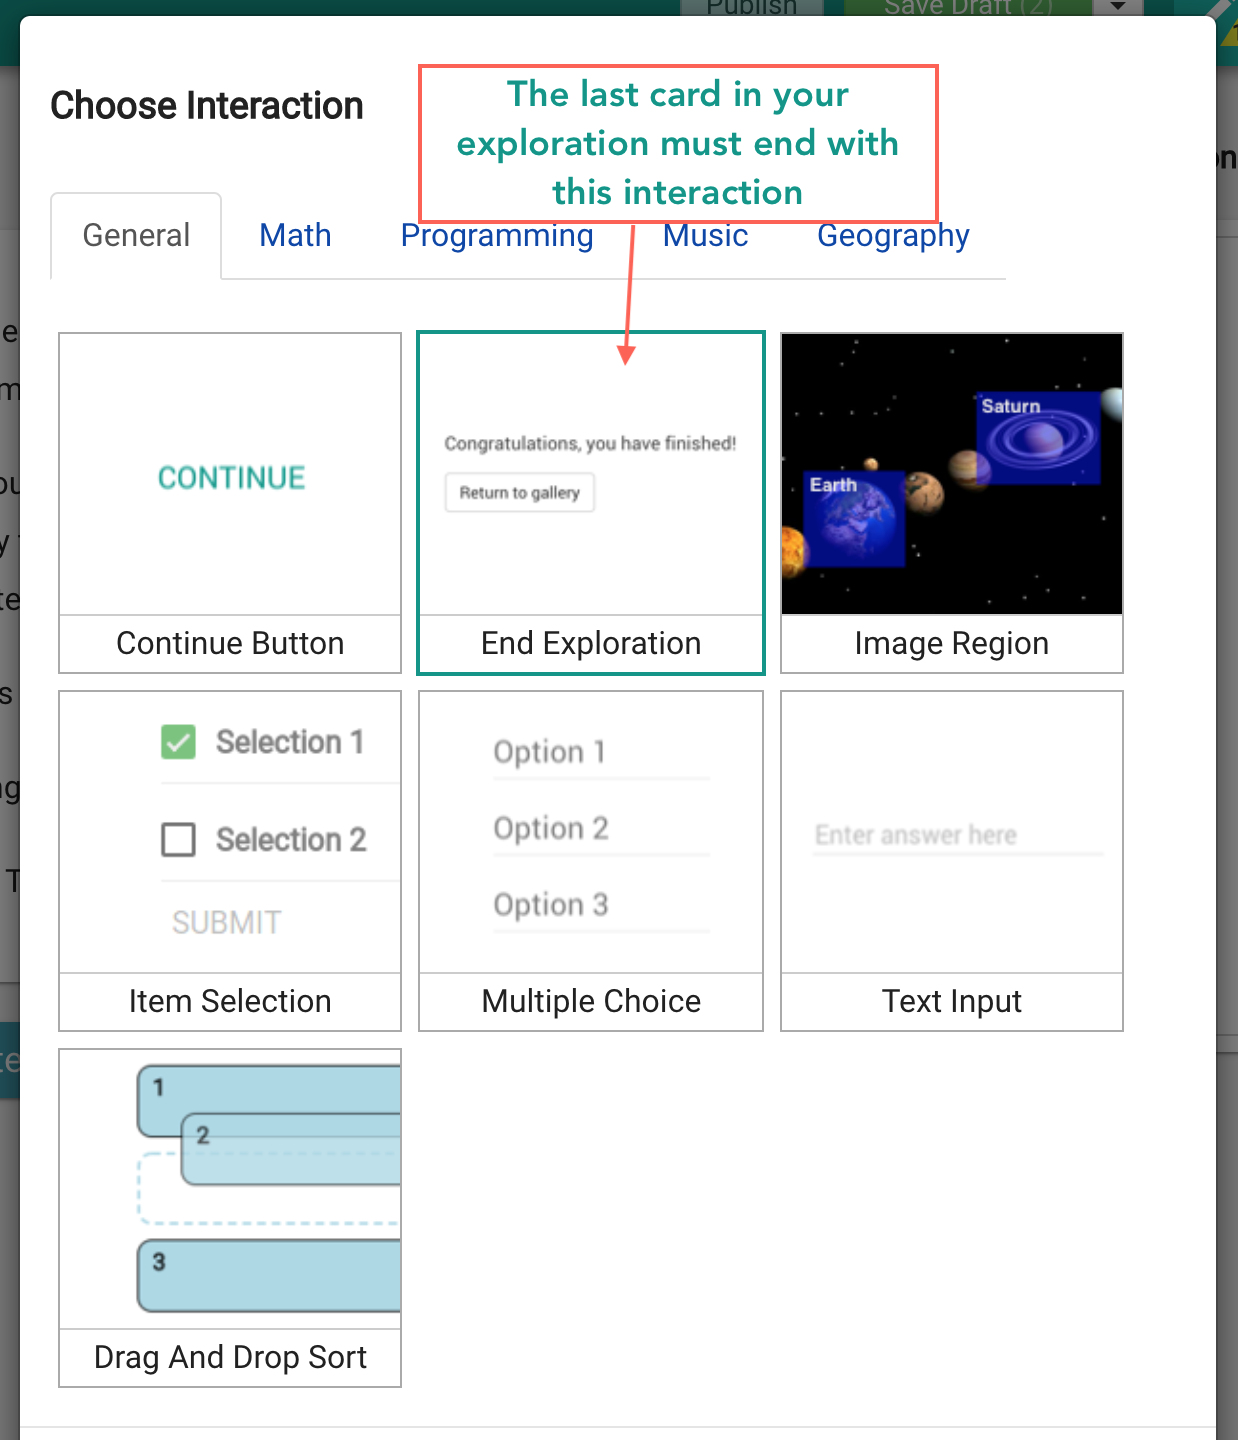
Fig. 7
In the Customize Interaction (End Exploration) box, you can recommend additional explorations to the learner by clicking on the Add exploration ID button. Otherwise click the
 button to end the exploration.
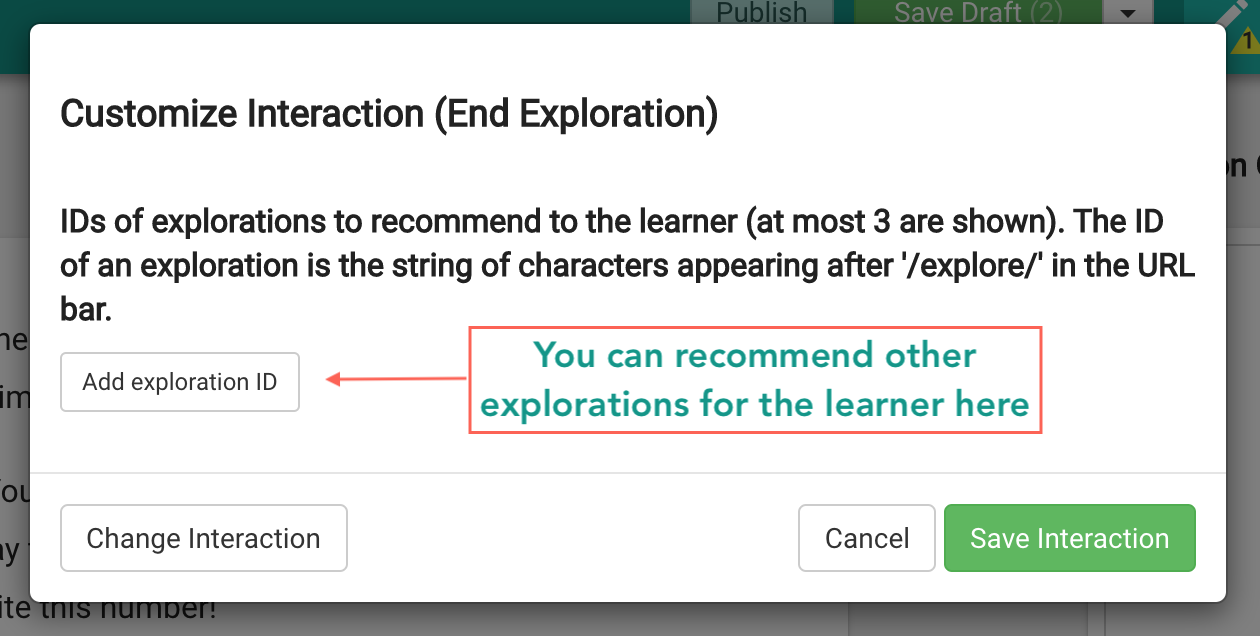
Fig. 8
Finding the ID of a published exploration
To find the ID of an exploration, go to it and click on the Settings button in the navigation bar. Look under the title Permissions to find the exploration URL. The ID is the last string of characters that appears after ‘/explore/’.
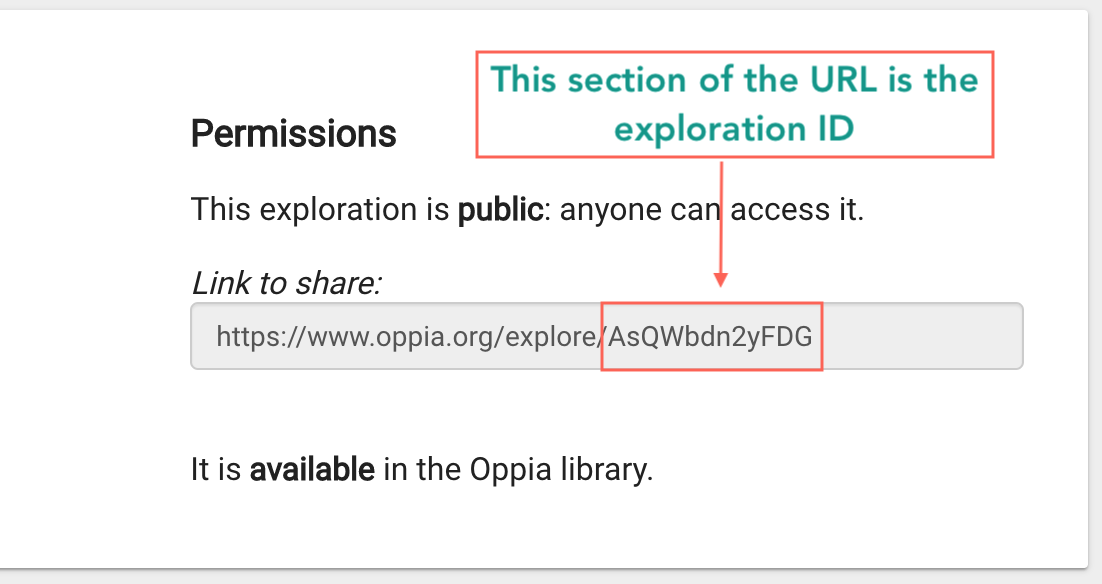
Fig. 9
Previewing the exploration
To preview your exploration from the beginning, go to the first card in your exploration and click on the
 Preview button in the navigation bar. This shows you what it would look like to a learner.
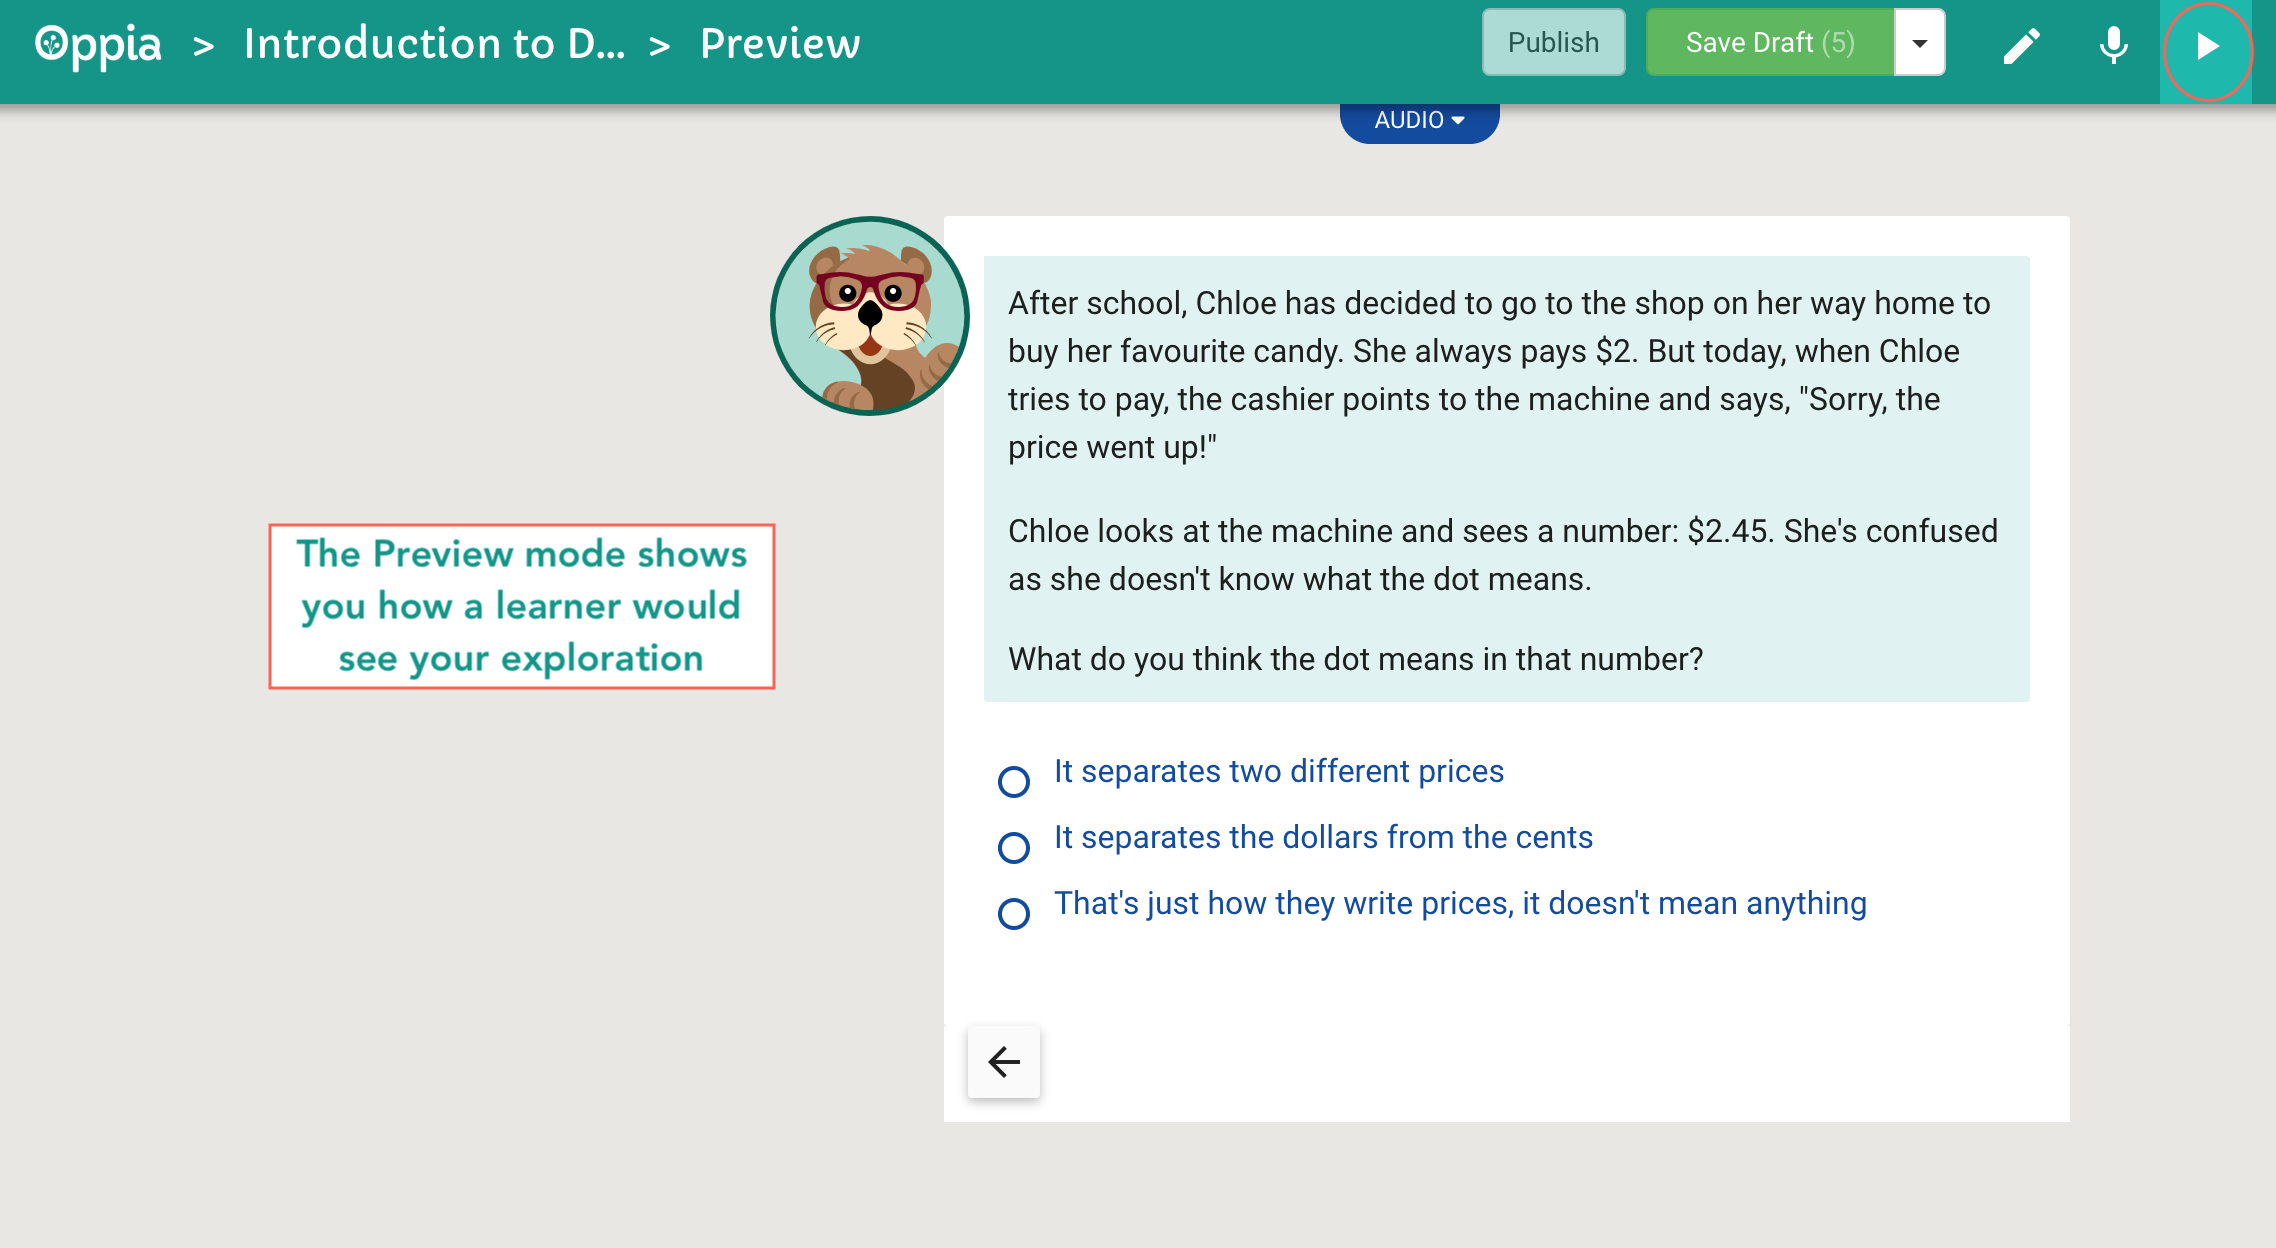
Fig. 10
If you want to make changes at any time during the preview, click the
 Editor button to return back to editing mode.
Saving and publishing
Save all changes in your exploration before publishing by clicking the
button.To publish the exploration, click the
 button.
You will be asked to fill out additional details for your exploration such as a goal, a category, tags etc. Click on
 when done.
Finally, click the
 button.
Once published, Oppia will display the URL for your exploration which will now be available in the Oppia library for anyone to learn. Congratulations!

Fig. 11