Creating a new lesson
In this section, you will learn how to:
Watch this video to learn how to create an exploration, or if you prefer reading the instructions instead, keep scrolling down.
Create a new exploration
To create a new exploration, from the Creator dashboard, click the Create button in the top right corner.
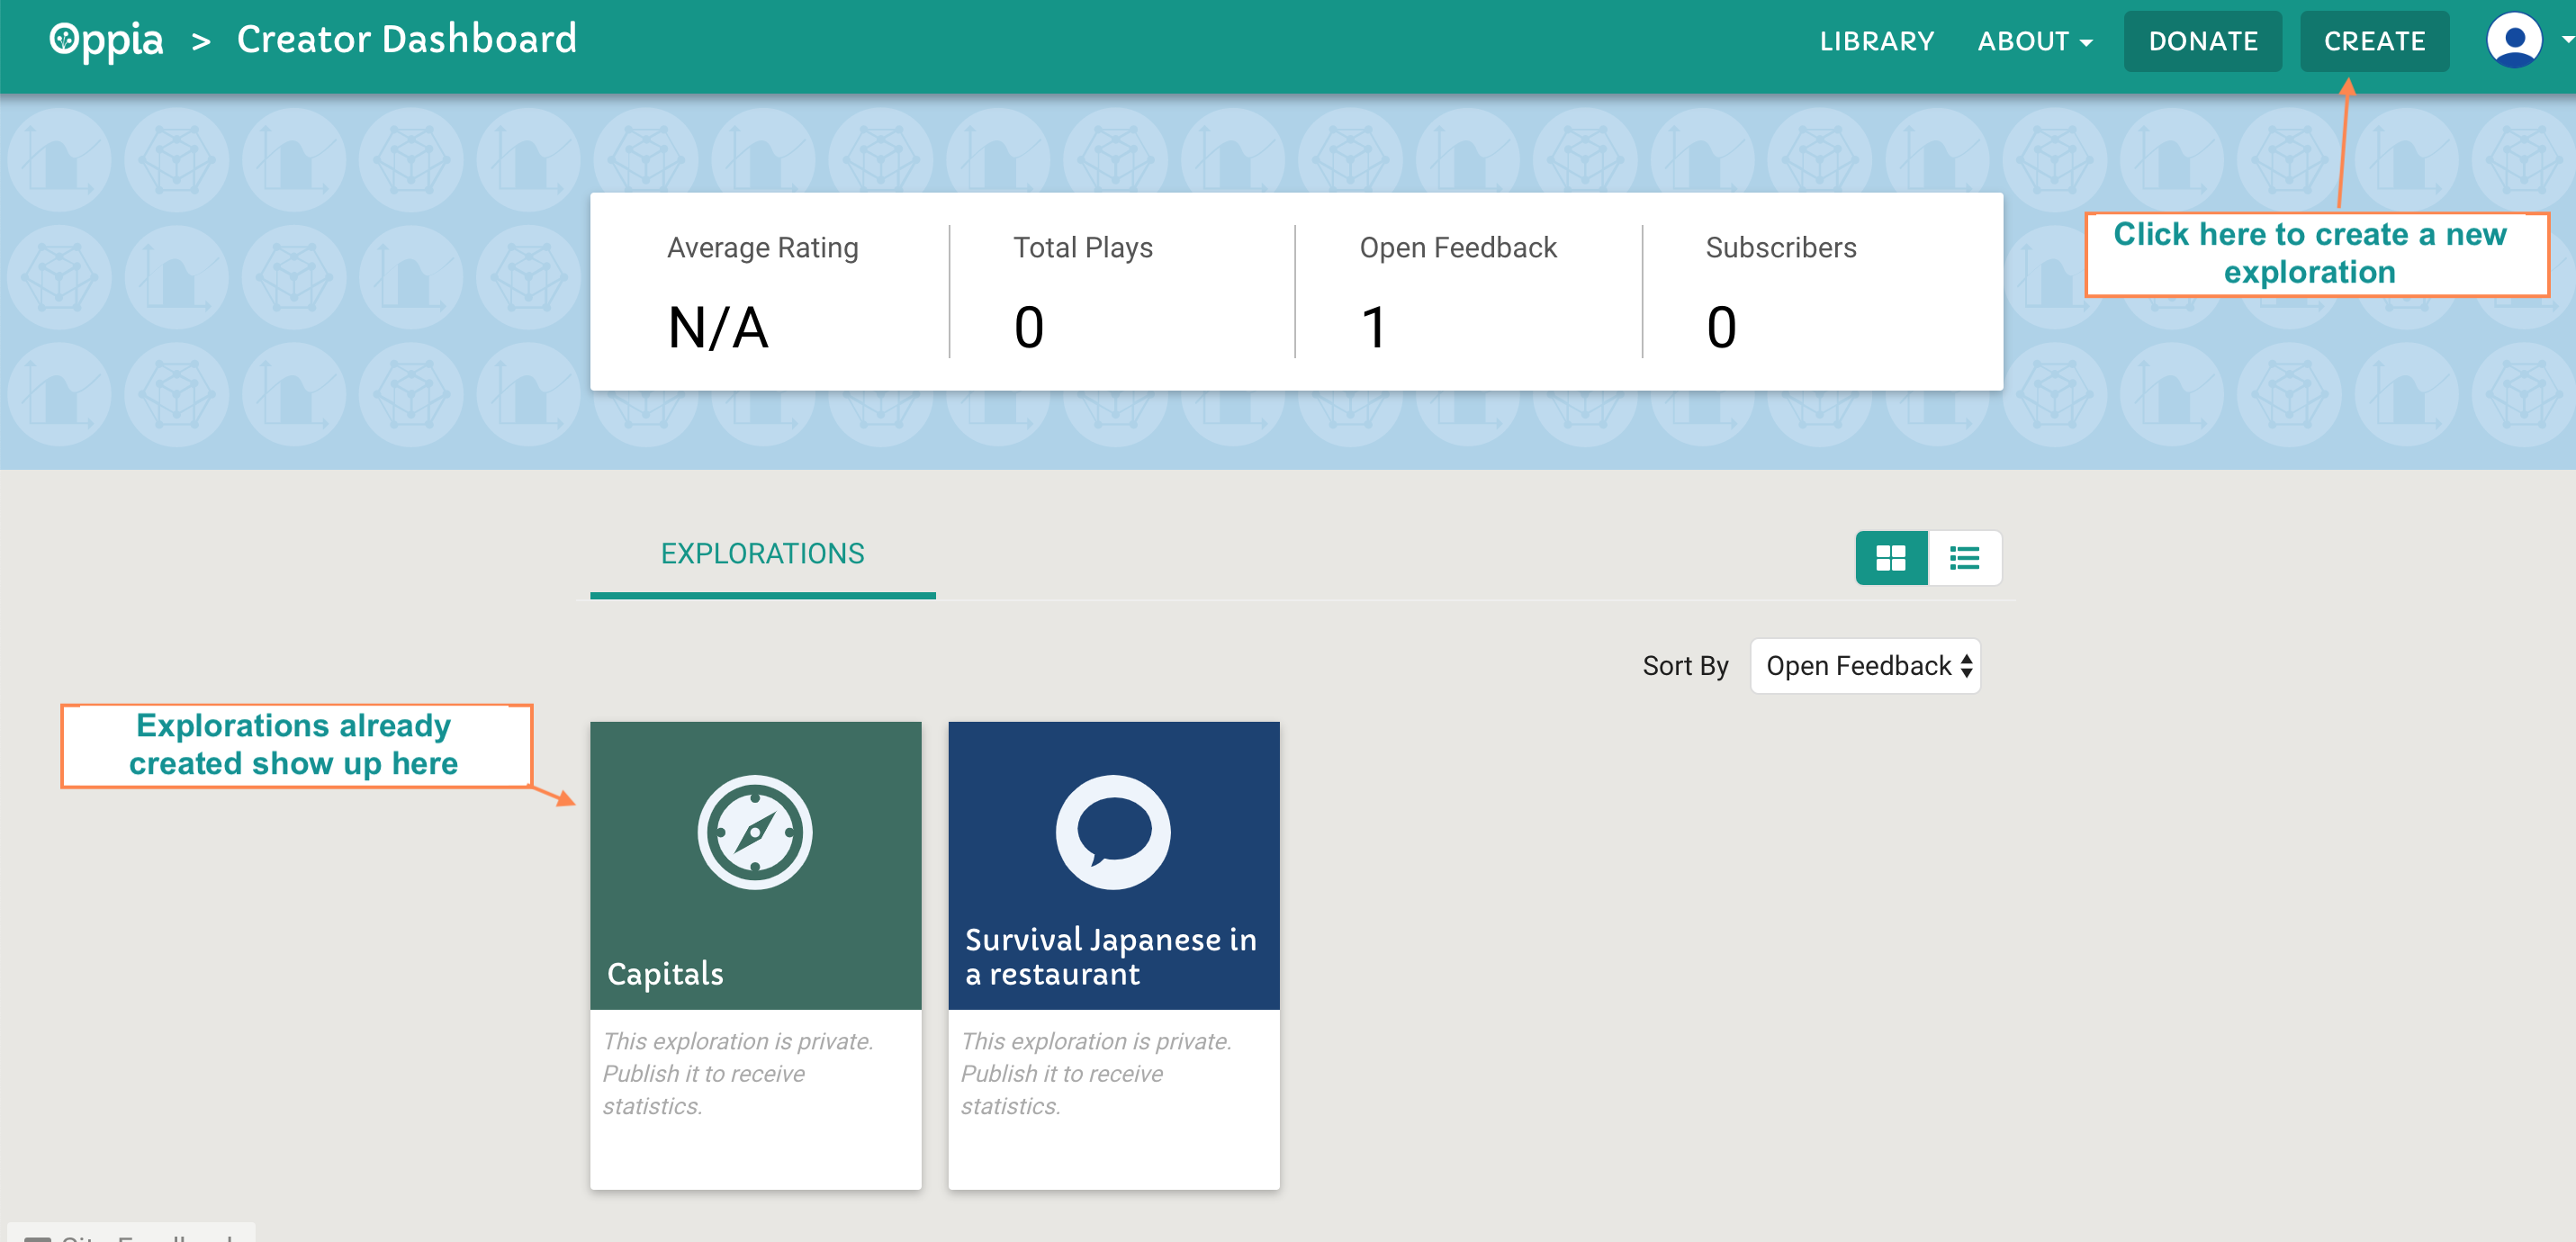
Fig. 1
You will see the Exploration Editor page. Now you will have to:
give your exploration a title
write the introduction
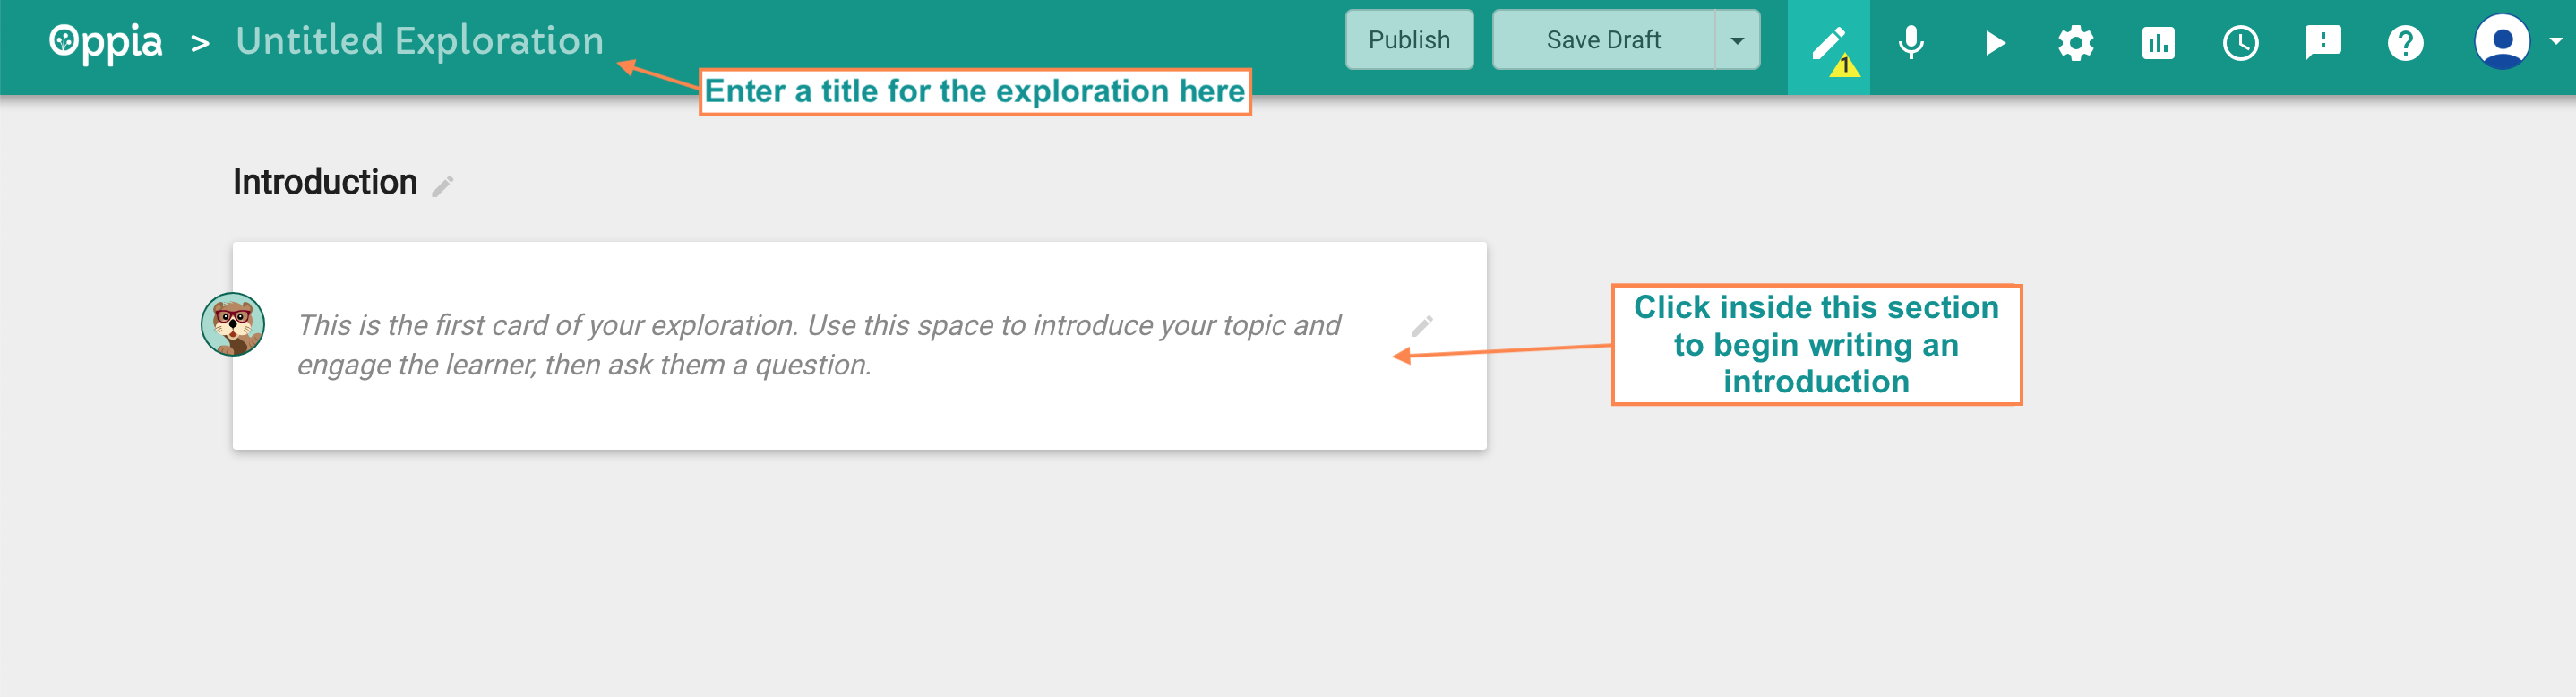
Fig. 2
To create a title for your exploration, click ‘Untitled Exploration’ in the top left corner. This will take you to the Settings page. In the first field Title, type in a descriptive title for your exploration. We’ll look at the other fields on this page in another section.
To get back to the Exploration editor page, click the
 Editor button.
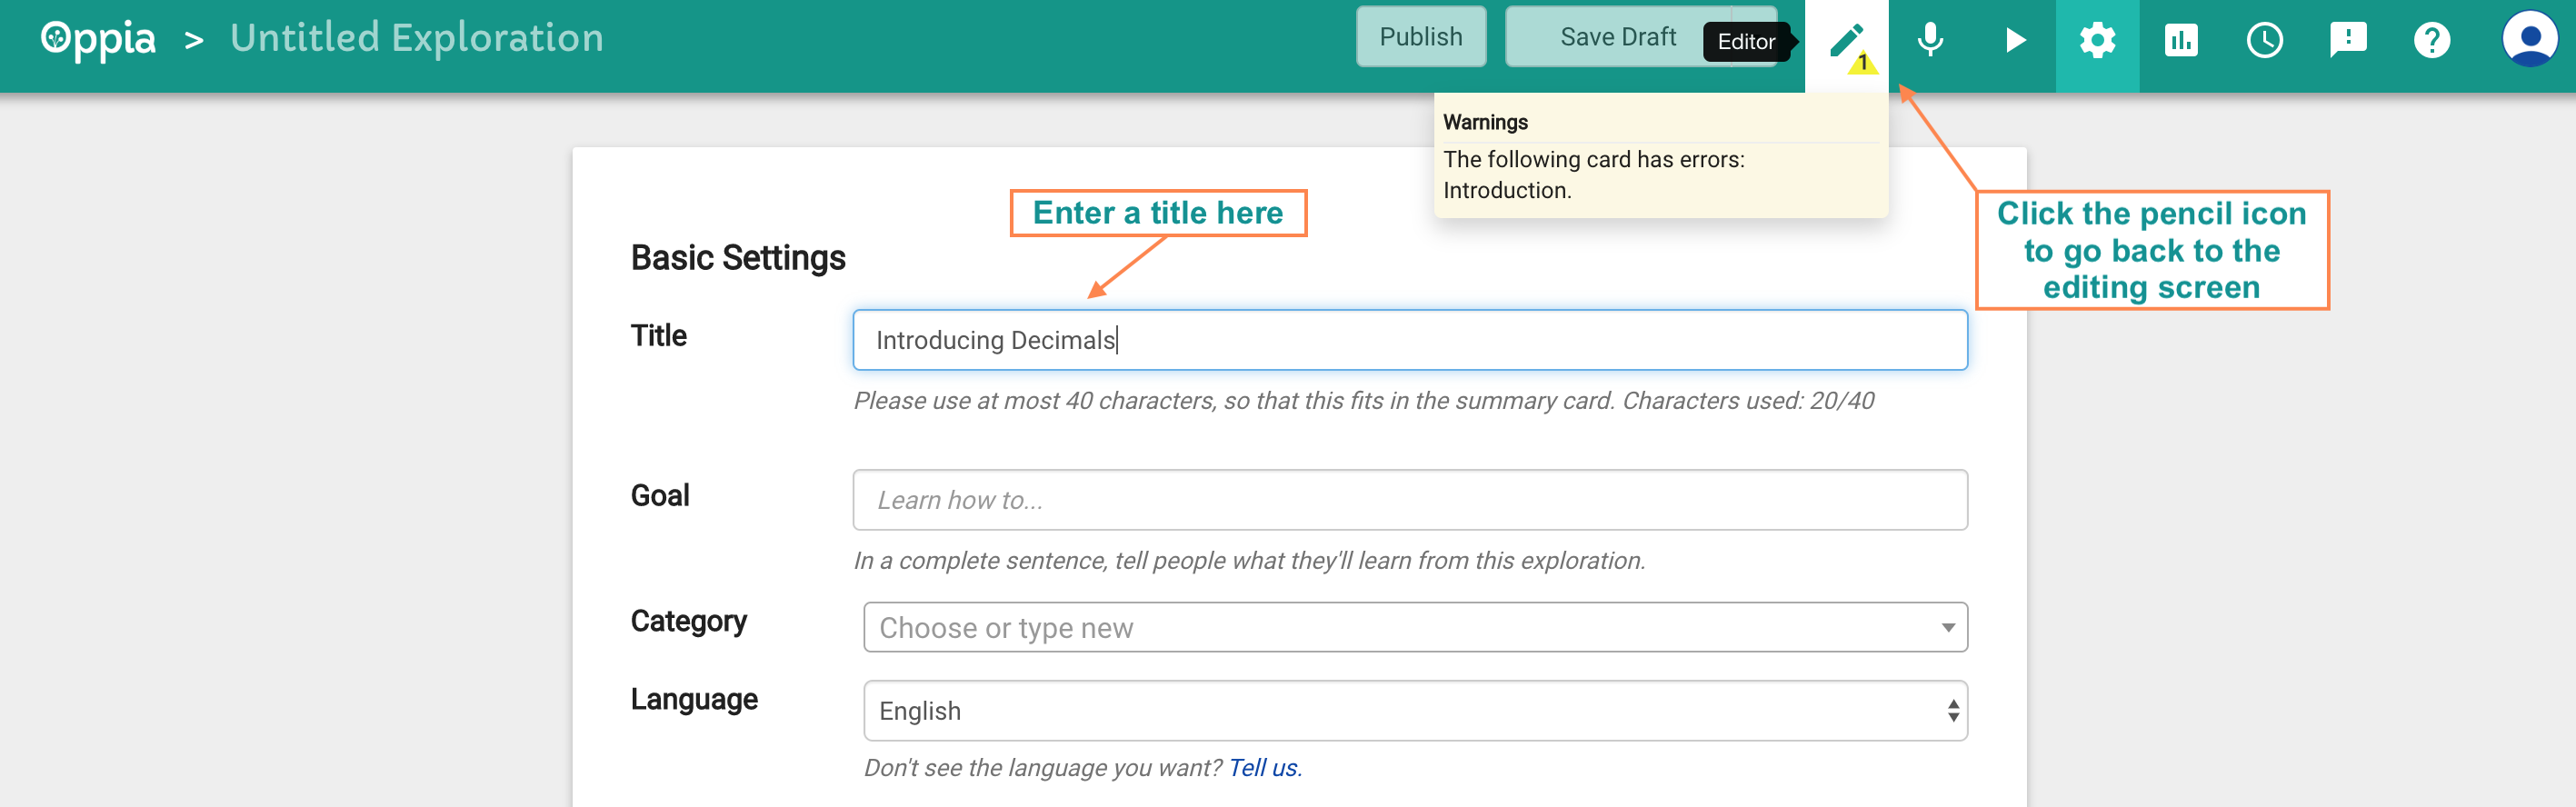
Fig. 3
Write the introduction
What to think about
Your goal here is to engage or hook the learner to continue on with the exploration. Write as if you are having a conversation with the student. Introduce your topic, the protagonist of your story, or set the scene.
You might also want to include what the student will already need to know beforehand and what they will need for this exploration (e.g., a paper and pen).
To begin writing the introduction, click inside the white box and begin typing. You will see different formatting options available to you.
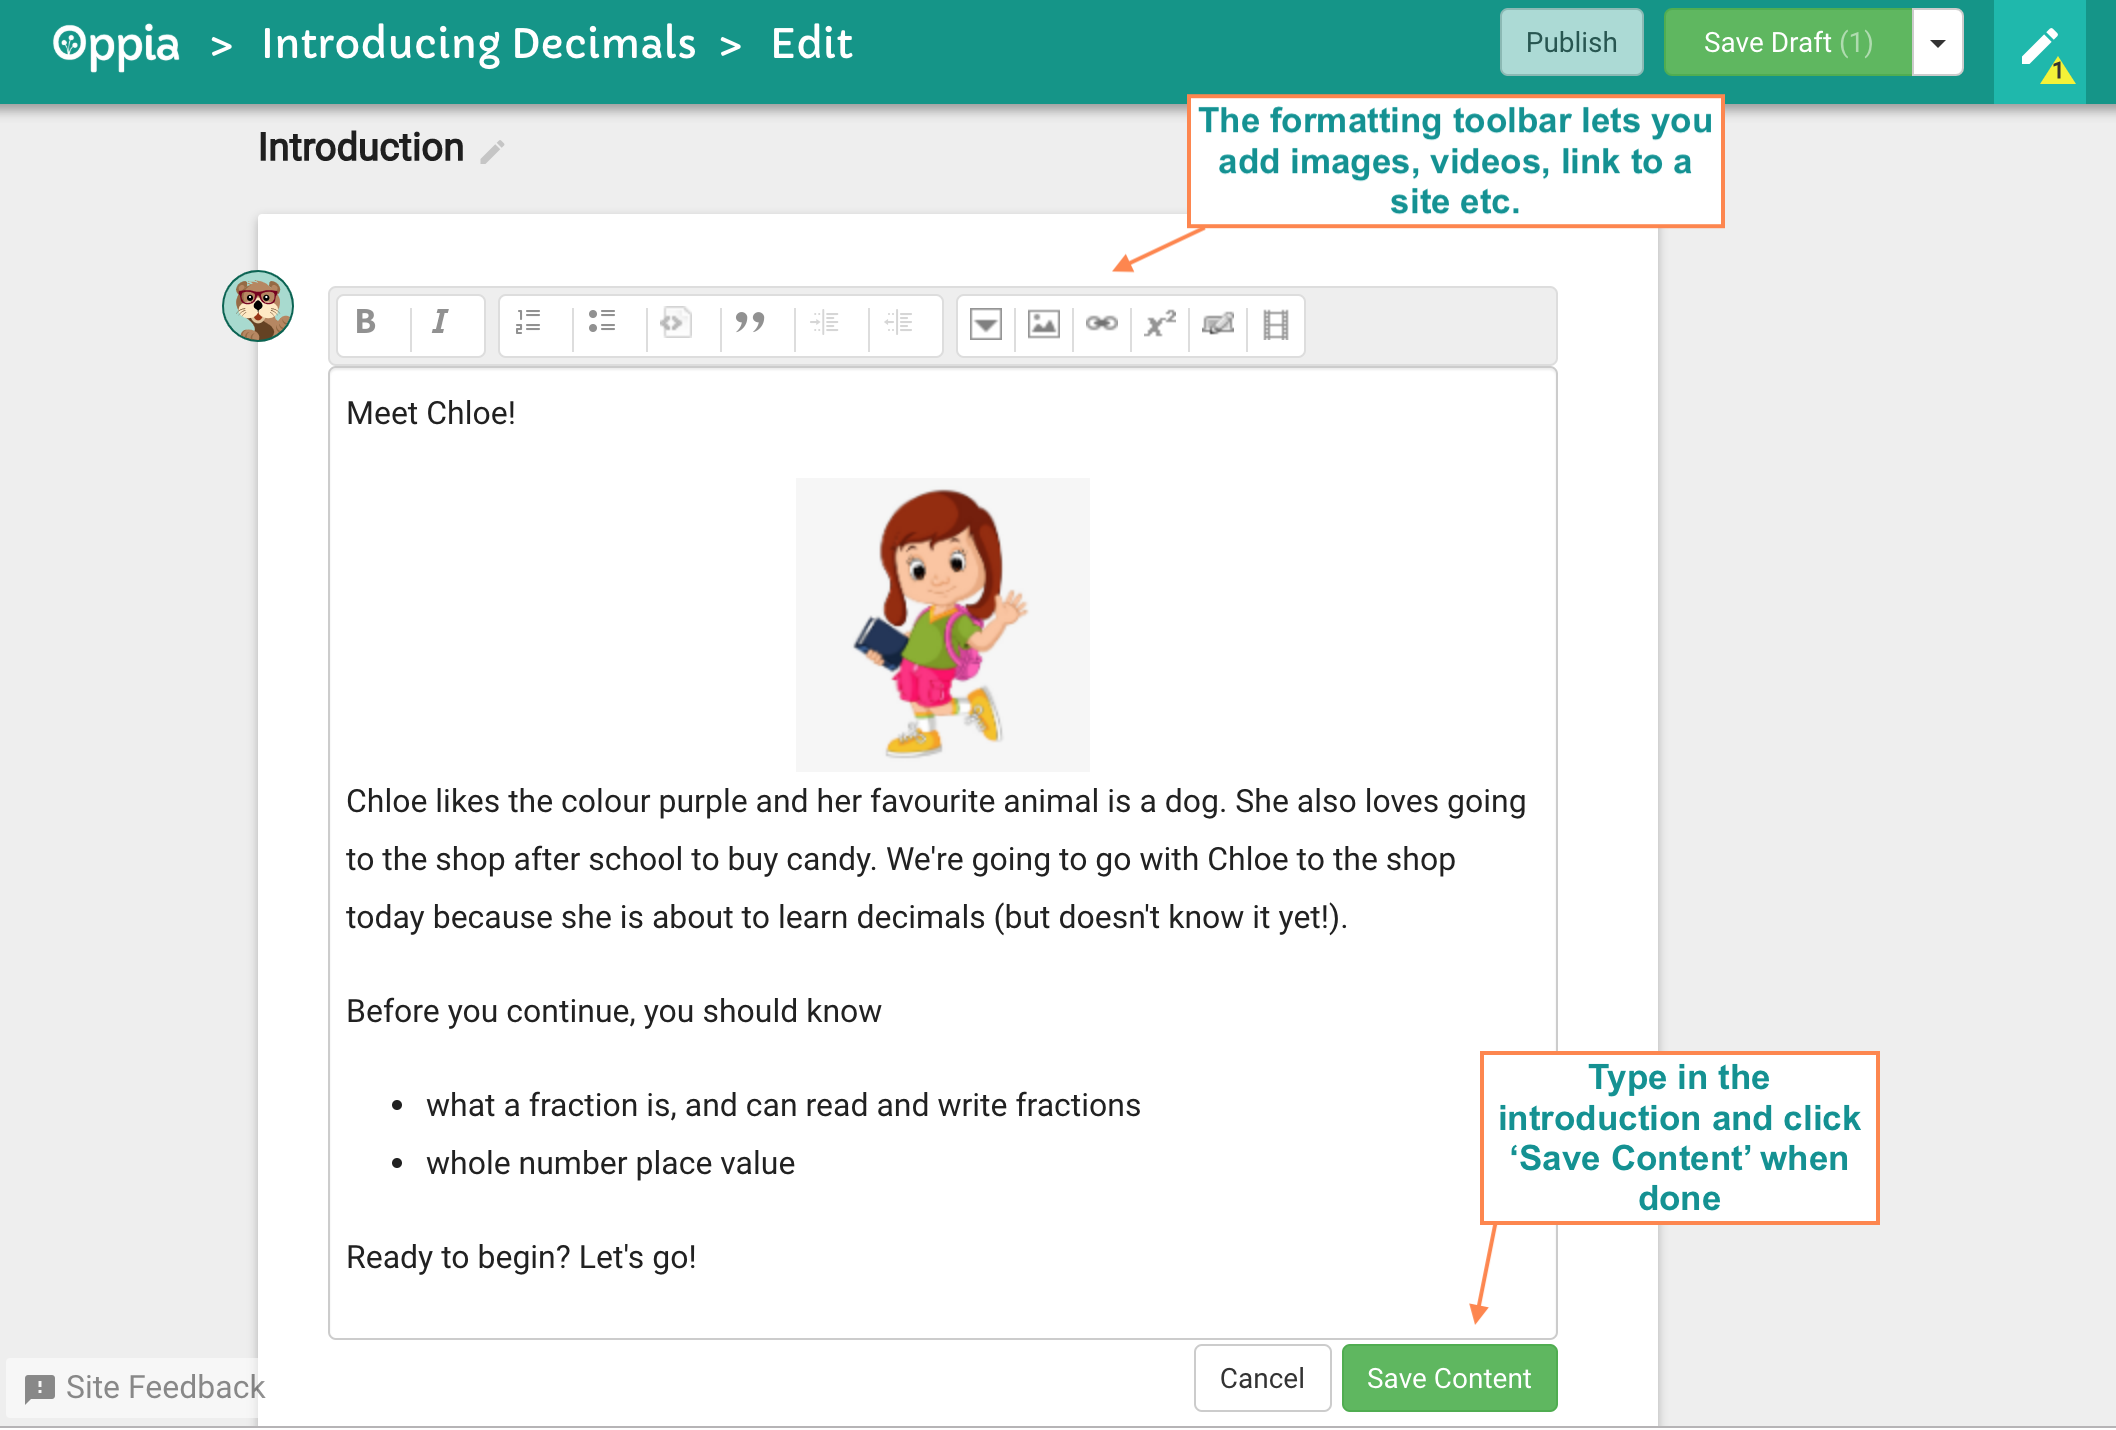
Fig. 4
When you’re done writing the Introduction card, click the
 button, then click the
  button.
A pop-up box will appear for you to choose an interaction. If you haven’t yet asked a question to your reader in the Introduction card, you can select ‘Continue Button’. Interactions will be covered in more detail in the Add Interactions section.
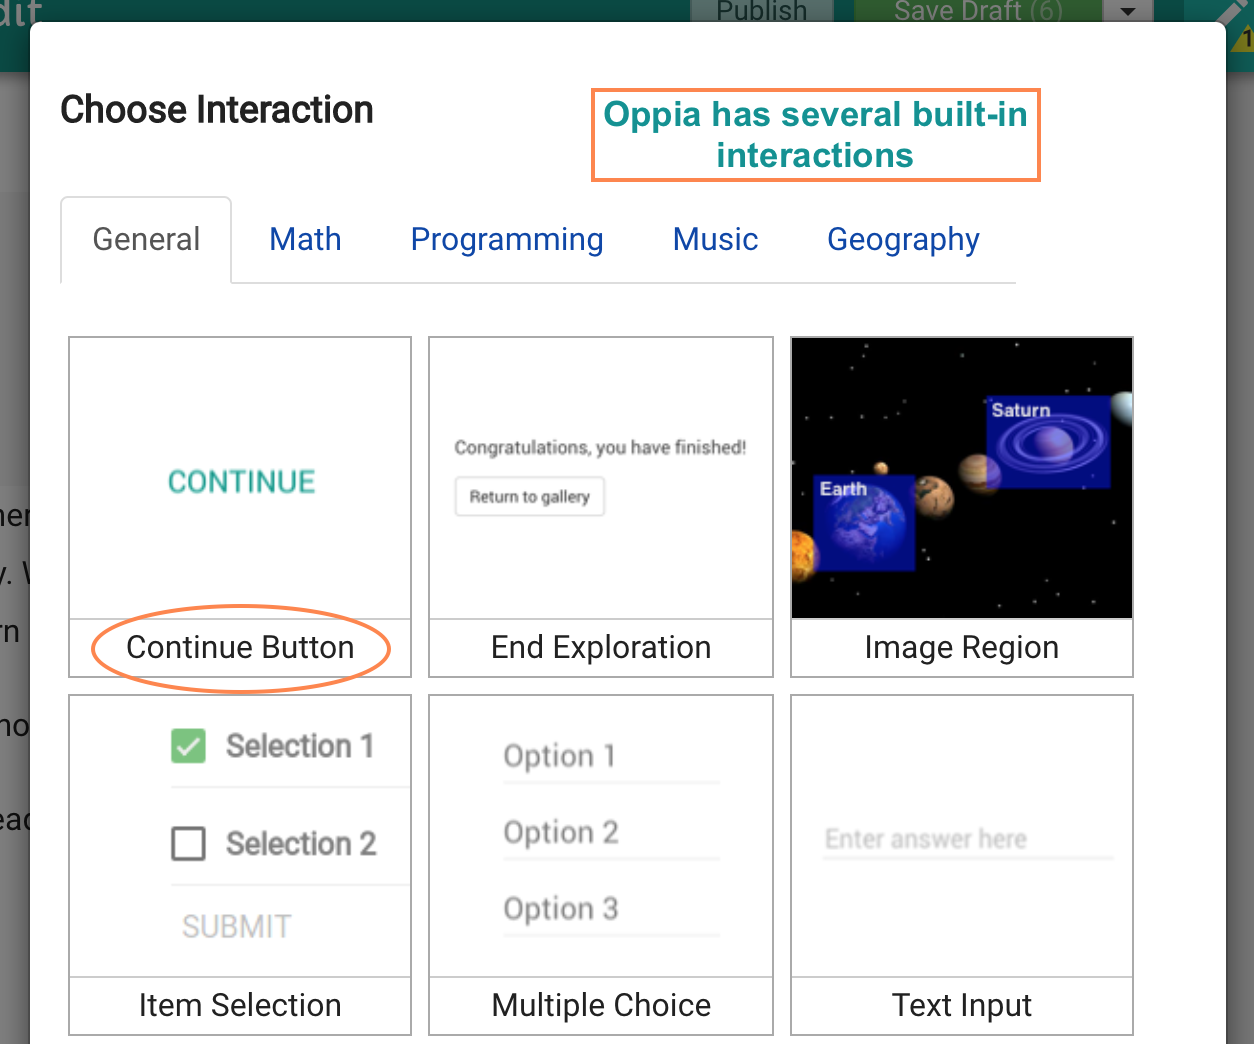
Fig. 5
Edit the Button label if you wish and then click the
 button.
You will now see the ‘Continue’ button below the Introduction card. Click on the bar below Learner’s Answers and Oppia’s Responses to direct what happens when the button is clicked.
To create a new card, click on the drop-down menu below Oppia directs the learner to… and select ‘A New Card Called…’. Enter the name of the new card in the blank field and click on the
 button.
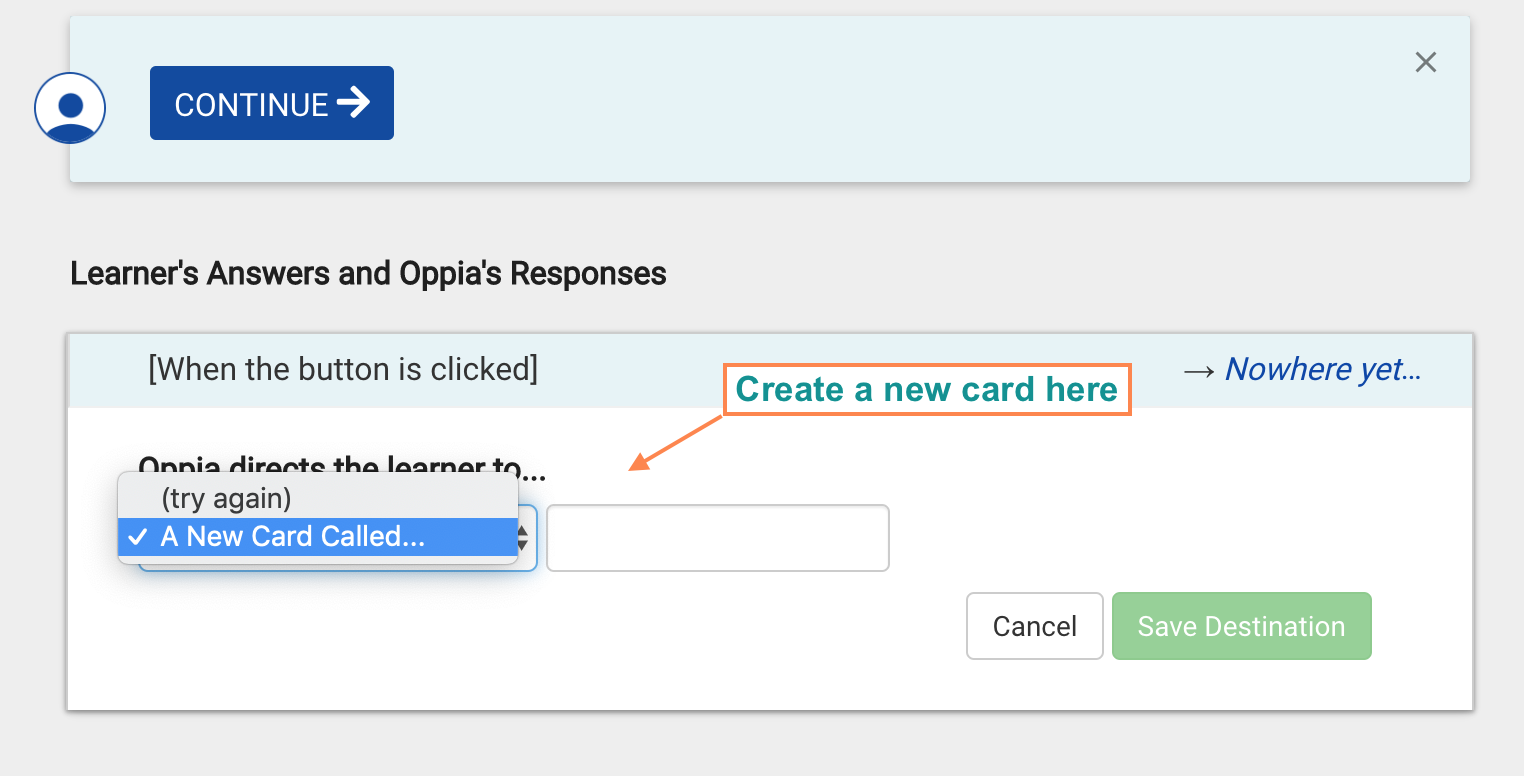
Fig. 6
The new card is now visible in the top-right section of the screen under Exploration Overview. Click on the card here to begin creating content.
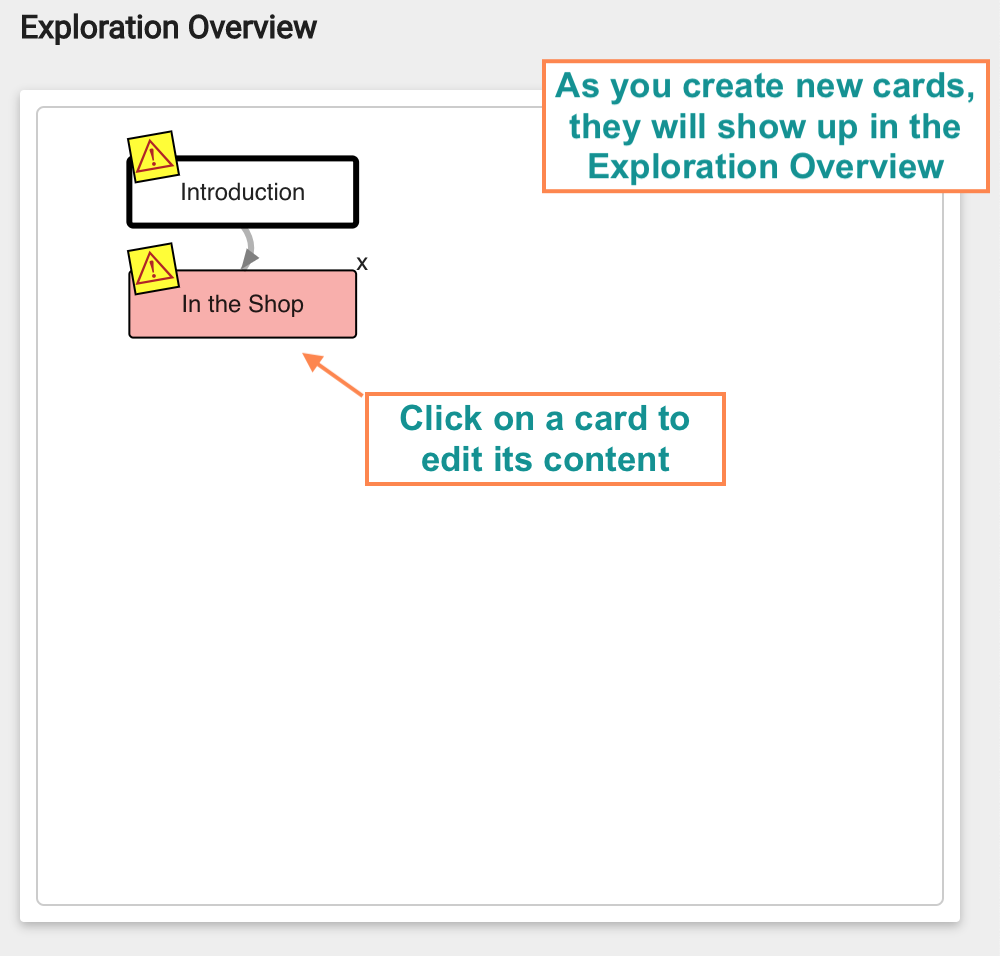
Fig. 7
Create Content
What to think about
It helps to have a specific question in mind that you want the learner to be able to answer at the end of the exploration. An example would be “What is the decimal equivalent of 1/2?” From here, come up with a series of questions and answers that will help the learner understand the concept of comparing fractions to decimals. This series of questions will form the main path of your exploration.
Now, think about how you want to present your exploration. Do you want it in the form of a story? Try to characterize your cards as much as possible—is an authority figure asking the question? Is the learner helping a character out by answering? Students are much more likely to remain engaged in this way as opposed to a rote question-answer card.
When creating the exploration, focus on simplicity and create something linear (you can always add complexity later). Remember your goal with creating cards is to model a conversation between yourself and the student.
There are four parts to a card:
Content
Interaction
Response
Hint
In this section, we’ll focus on the content where you will ask a question to the learner.
In the new card just created, click inside the white box to begin typing the content. The goal is to ask a question, so you may set the scene and then pose the question. When you’re done, click the green
button.
Formatting Content
The editor box gives you several formatting options including bolding, italicizing, inserting images, links, videos etc. As an example, you may choose to add an additional tab in this section to provide extra information using the ‘Insert tabs’ button (if you want to provide a hint but not have it show up right away, see the Add Hints section instead). This will end up looking like this:
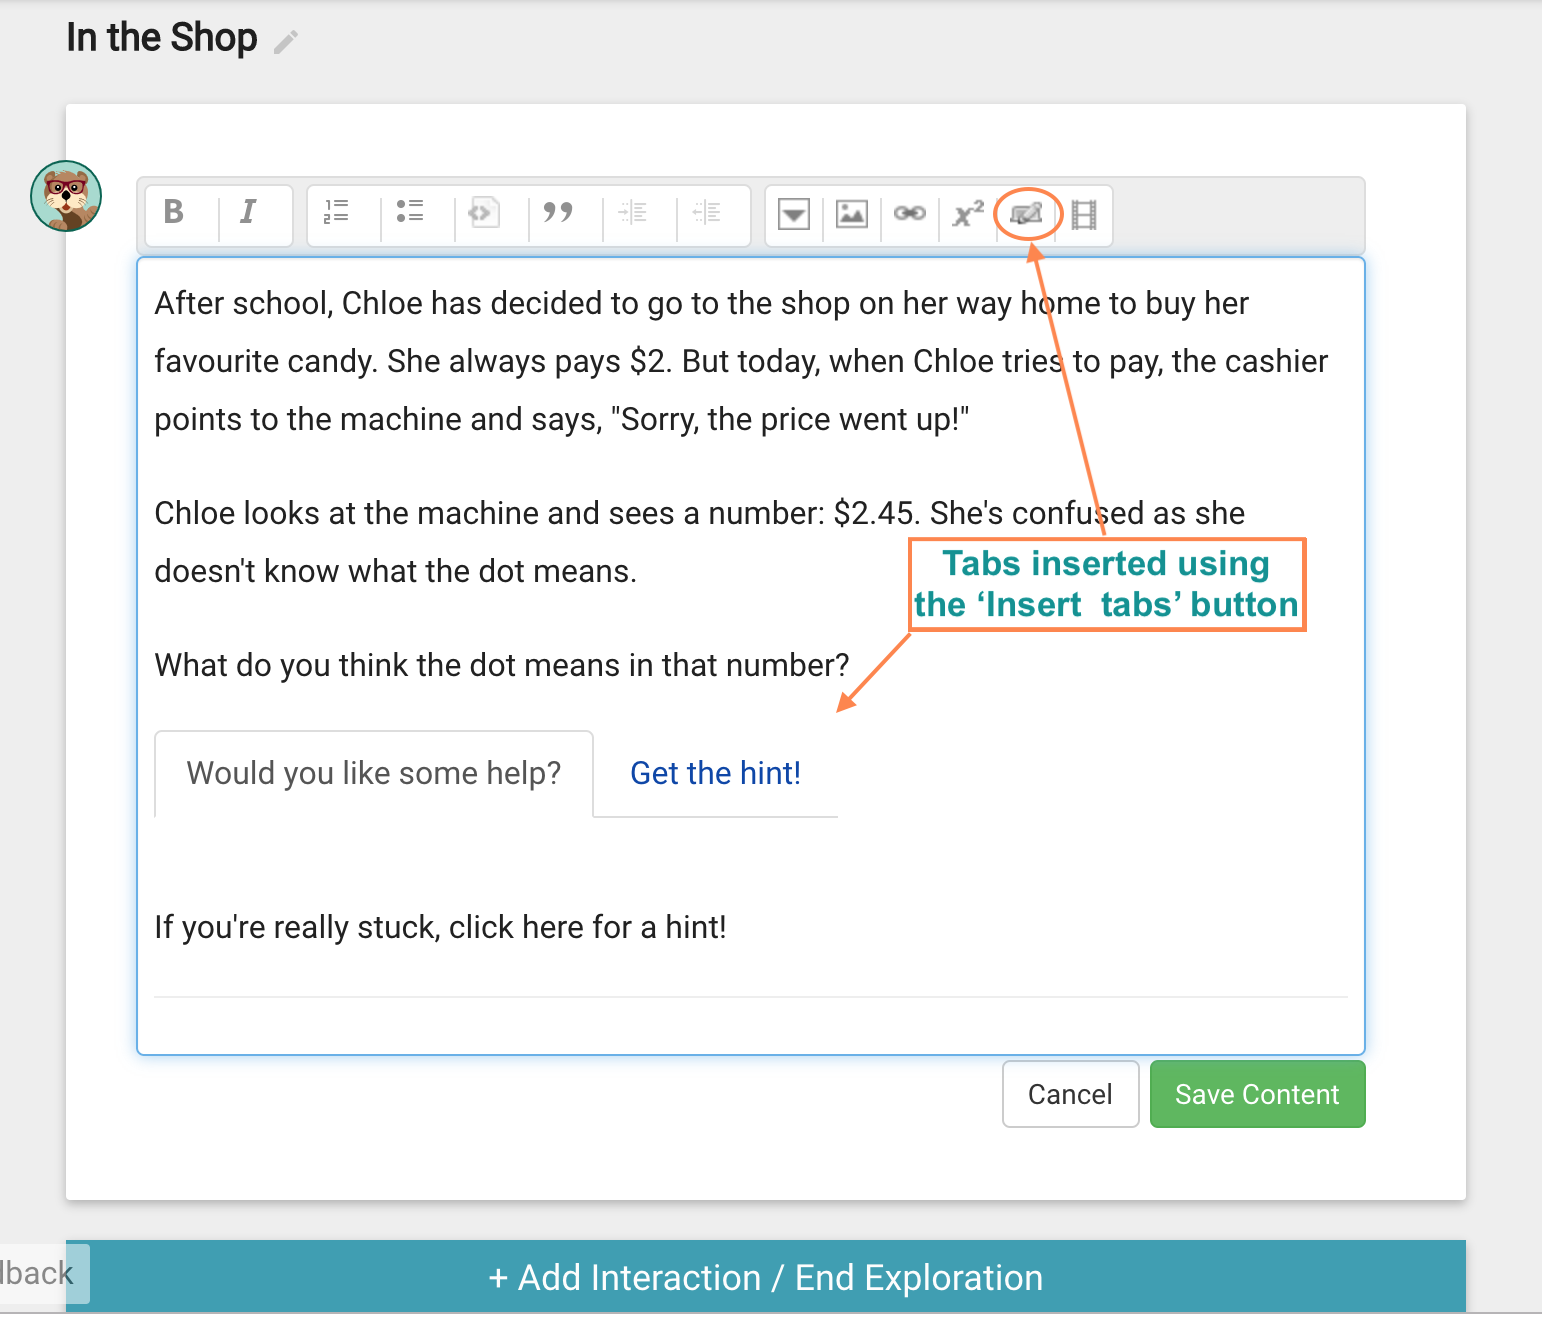
Fig. 8
Add Interactions
What to think about
How do you want your learner to answer the question? Do you want them to type in an answer, or choose items from a selected list? Perhaps you want the learner to drag and drop items in a particular order. Oppia has several built-in interactions sorted by subject matter that you can choose from.
Now that you’ve posed a question, the next step is to add an interaction—the type of answer the learner might give.
Click the
button.The Choose Interaction pop-up box appears. Click on the desired interaction which will bring up the Customize Interaction box. The customization options will depend on the type of interaction chosen. In the example below, we have selected the Multiple Choice interaction.
When you have finished customizing the Interaction, click on the
button.
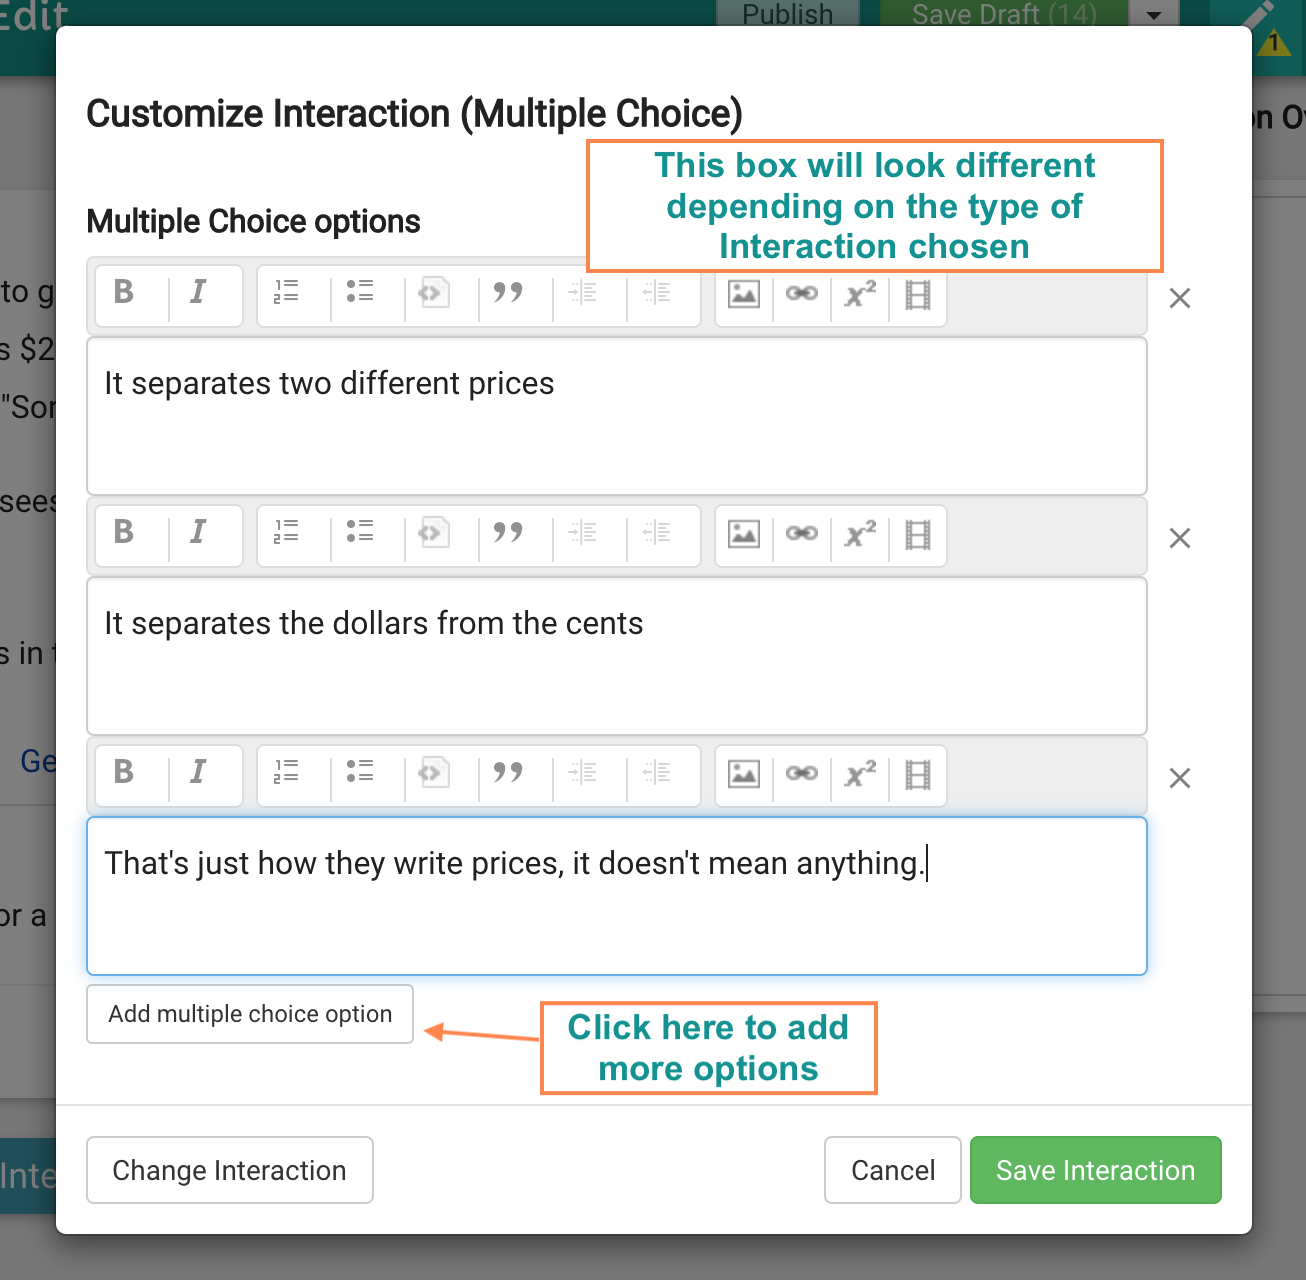
Fig. 9
Add Responses
What to think about
The Response section is where you decide how Oppia should respond based on the learner’s answer. Do you want the learner to redo the question or move them to a different card? If you want them to try again, include some constructive feedback about why the answer was wrong. Even if they have answered correctly, explain why the answer was right.
After you save an interaction, the Add Response pop-up box appears.
Choose the learner’s possible answer, and add the appropriate response. To add a new response, click the
 button. You can direct the learner to a new card based on a certain answer by creating one here.
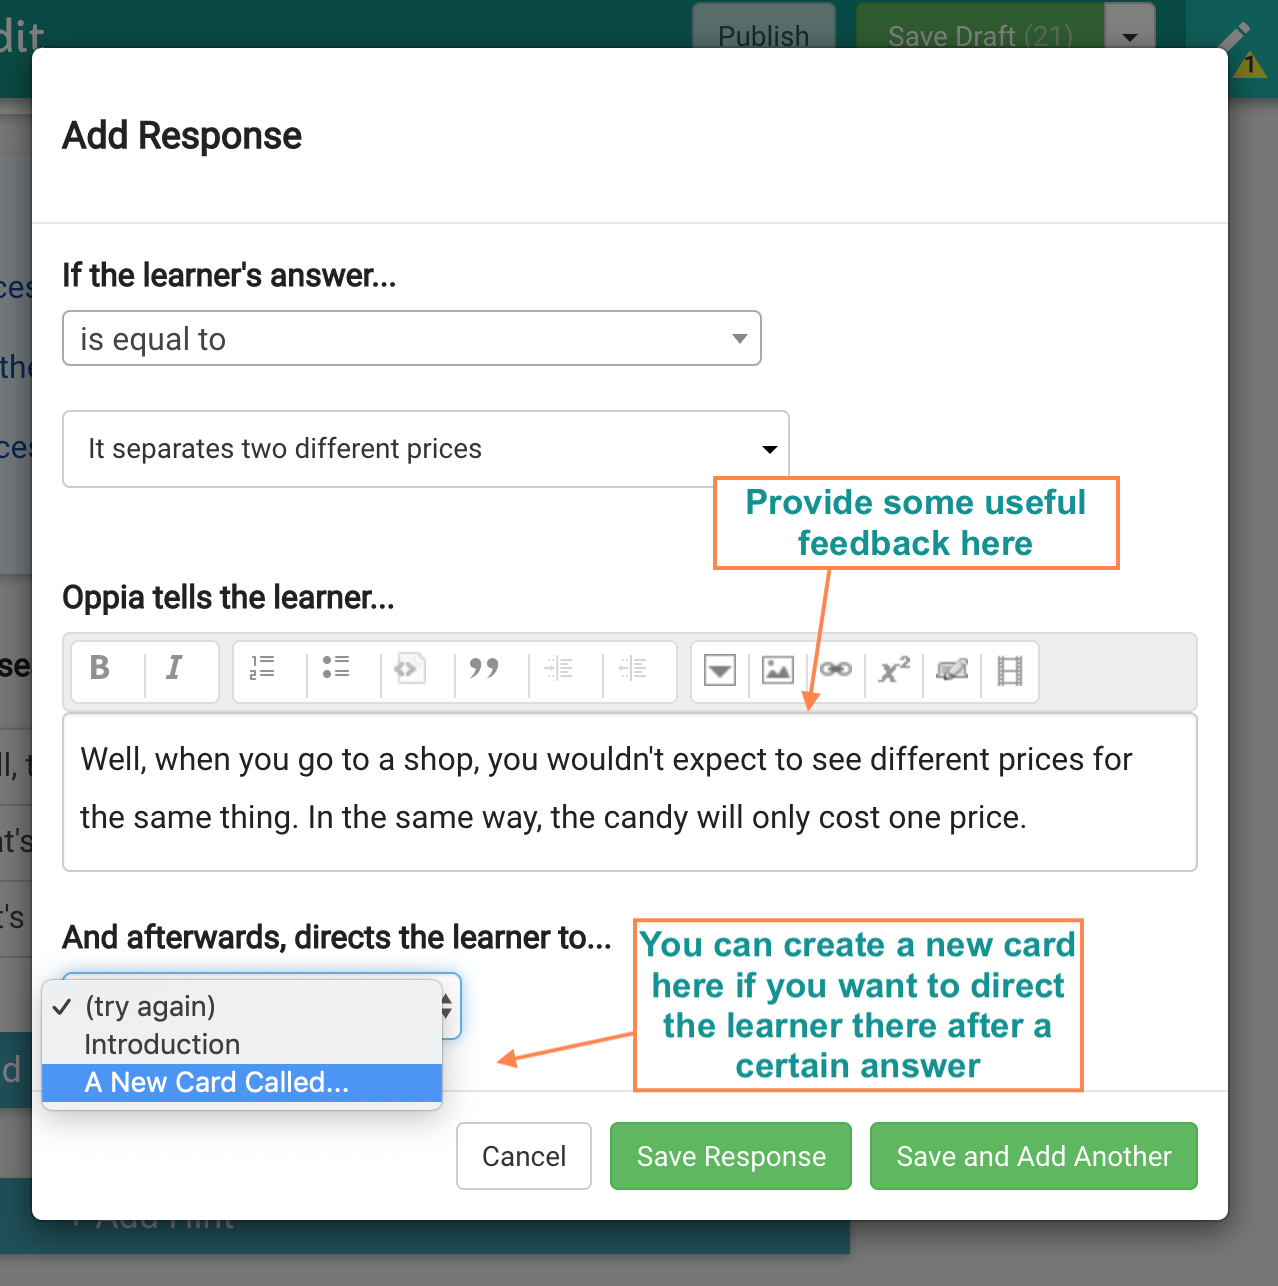
Fig. 10
When you have finished adding responses, click the
 button. This brings you back to the Editing screen where you can view the responses you’ve created. From here, you can add a new response, or edit or delete the responses you’ve created by clicking on the relevant box.
You will notice a checkbox titled Solicit Answer Details when you come back to the Editing screen. If you would like Oppia to ask the learner to explain why they chose the answer on that card, checkmark this box. You can find more details on this in the Improvements tab page.
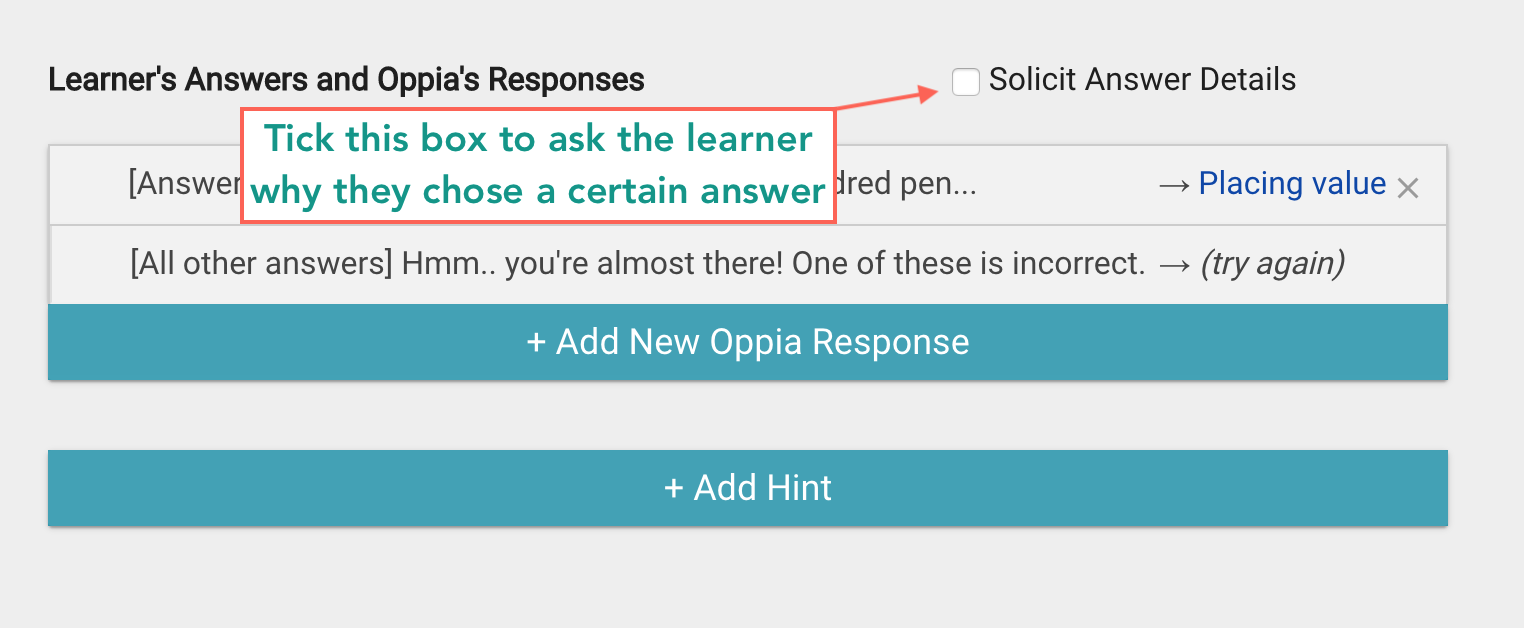
Fig. 11
A word on Loopbacks
When a learner answers incorrectly, there is an option to get the learner to ‘try again’ or loop back and answer the question again. It isn’t always a good idea to do this. Think about whether you are able to group the possible ‘wrong’ answers in such a way that you can provide detailed feedback to the learner.
If you cannot do this, i.e., if the possible ‘wrong’ answers have come in through a text-field (so you have no way of knowing what the learner might type), or if there are lots of wrong answers to a question—it is better to send the learner to a separate branch to address their misconceptions. Looping them back to the question in this case might cause frustration as they will end up trying to guess what you want them to say.
Add Hints
When a Hint will appear
To prevent learners from abusing the Hint feature, a hint can be requested only if one of the following conditions is satisfied:
The learner submitted a wrong answer at least once.
It has been more than 30 seconds since the learner last submitted an answer.
You may add one or more hints to a card in case the learner gets stuck.
To add a hint to a card, click the
 button at the bottom of the Editing screen.
The Add Hint pop-up box appears. Type in the hint and click the
 button.
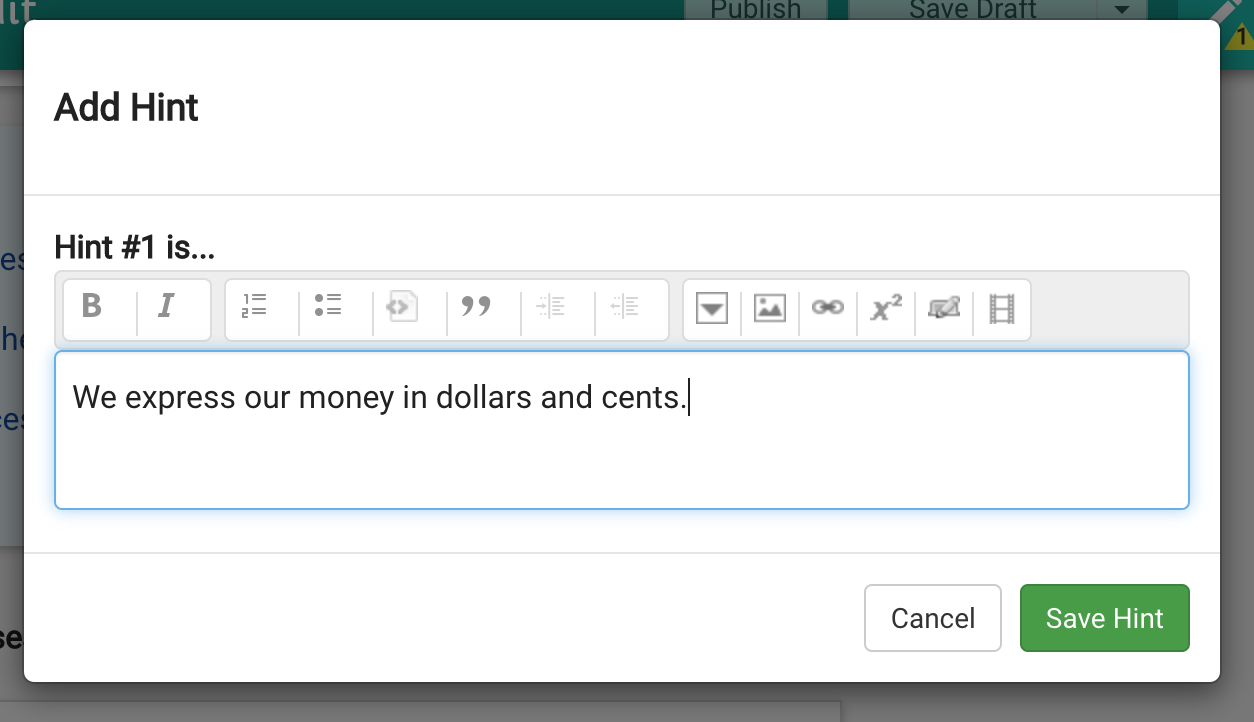
Fig. 11